🌸 10 Easy Spring Crafts to Refresh Your Home
🌸 10 Easy Spring Crafts to Refresh Your Home
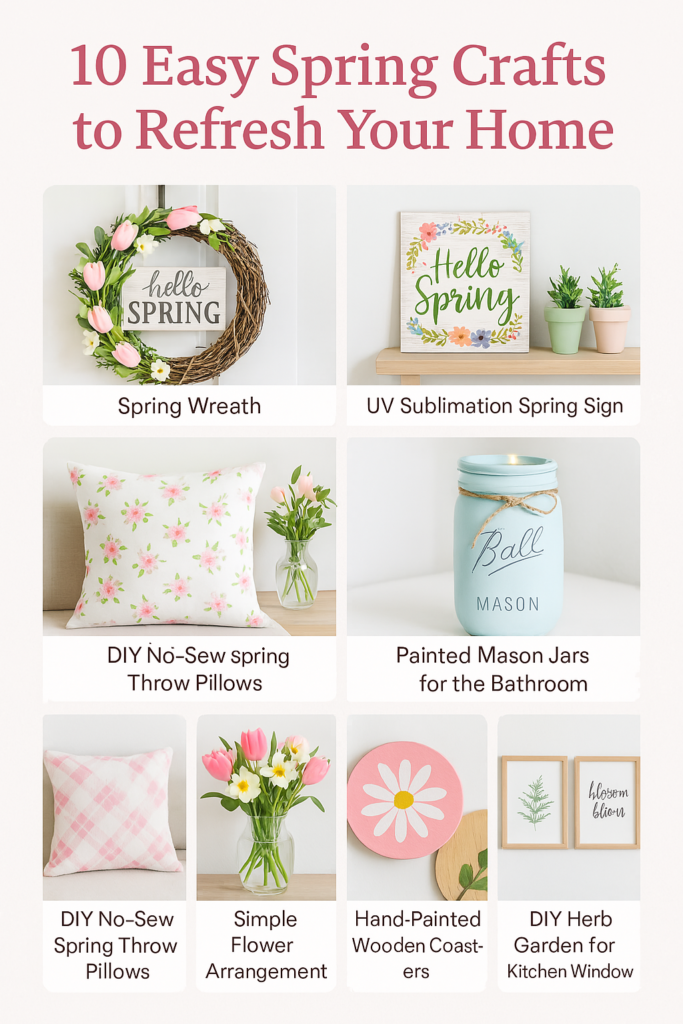
Spring is the season of fresh starts, blooming flowers, and bright, cheerful vibes. It’s the perfect time to give your home a little seasonal refresh — and what better way than with some simple, creative DIY projects? Whether you’re new to crafting or just looking for some fun ideas, these 10 spring crafts are easy, affordable, and will instantly bring life to your space!
1. Spring Wreath for Your Front Door

Nothing says “welcome” like a beautiful handmade wreath! Use a grapevine base and layer in faux greenery, tulips, daisies, or pastel-colored ribbon. Bonus: Add a wooden sign in the center with a seasonal phrase like “Hello Spring” for extra charm.
🌸 Spring Wreath for Your Front Door
Supplies:
- Grapevine wreath base
- Faux flowers (tulips, daisies, etc.)
- Greenery stems
- Ribbon (pastel or burlap)
- Hot glue gun
- Floral wire
- Small wooden sign (optional)
Instructions:
- Lay out your greenery and florals to decide placement.
- Attach greenery first using floral wire or hot glue.
- Layer in flowers evenly or in a cluster on one side.
- Add ribbon bow or wrap around part of the wreath.
- Attach wooden sign to the center or bottom if desired.
- Hang and enjoy!
2. UV Sublimation Spring Sign
Add a pop of personality with a spring-themed UV sublimation sign. Choose designs with floral elements, bees, bunnies, or inspirational quotes. These signs are perfect for entryways, mantels, or tiered trays — and they make great gifts too!
🌼 UV Sublimation Spring Sign
Supplies:
- Blank sublimation sign (wood or metal)
- Sublimation printer & ink
- Heat press
- Protective paper
- Design software (Canva, Cricut, etc.)
Instructions:
- Design your spring image or phrase.
- Print using sublimation ink on sublimation paper.
- Place printed design face down on the blank sign.
- Press with heat press according to material’s settings.
- Let cool and display!
3. Mini Potted Plant Shelf Display

Bring the outdoors in with small potted plants or succulents. Paint mini terra cotta pots in soft spring shades like mint, blush, or lavender, and display them on a shelf or windowsill. You can even stencil on cute phrases like “grow” or “bloom.”
🌿 Mini Potted Plant Shelf Display
Supplies:
- Mini terra cotta pots
- Acrylic or chalk paint
- Small plants or faux greenery
- Paintbrushes
- Stencils (optional)
Instructions:
- Paint pots in spring colors and let dry.
- Add stenciled words or shapes if desired.
- Pot your plants or greenery.
- Arrange on a windowsill or shelf.
4. Painted Mason Jars for the Bathroom
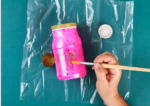
Give your bathroom a fresh touch with painted mason jars. Use pastel chalk paint, distress them lightly, and use them to hold cotton balls, makeup brushes, or fresh flowers. Tie twine or a little ribbon around the rim for an extra detail!
🛁 Painted Mason Jars for the Bathroom
Supplies:
- Mason jars
- Chalk paint
- Paintbrush or sponge
- Twine or ribbon
- Sandpaper (for distressing)
- Clear sealant (optional)
Instructions:
- Paint jars with 2–3 coats of chalk paint.
- Lightly distress edges with sandpaper.
- Add twine or ribbon around the rim.
- Seal if desired and use for storage or décor.
5. DIY No-Sew Spring Throw Pillows

Switch out your winter pillows with bright, happy ones. Use spring-themed fabric and fabric glue or hemming tape to make quick no-sew pillow covers. Patterns like gingham, florals, or bunnies instantly freshen up any room.
🛋️ DIY No-Sew Spring Throw Pillows
Supplies:
- Spring fabric
- Fabric glue or hemming tape
- Pillow inserts
- Scissors
- Iron (for hemming tape)
Instructions:
- Cut fabric to fit pillow insert plus 1 inch extra on all sides.
- Fold over edges and use glue or hemming tape to seal three sides.
- Insert pillow and seal the final edge.
- Let dry completely before use.
6. Simple Flower Arrangement in a Vase

You don’t need to be a florist to create a gorgeous spring arrangement! Grab a glass vase, fill it with fresh or faux blooms (tulips, daffodils, or ranunculus are perfect), and add a few sprigs of greenery. Display it on your dining table or coffee table for a cheerful focal point.
💐 Simple Flower Arrangement in a Vase
Supplies:
- Glass vase
- Faux or fresh flowers
- Greenery stems
- Floral tape or foam (optional)
Instructions:
- Clean vase and prep stems by trimming them to size.
- Place greenery first for structure.
- Add flowers evenly, working in odd numbers.
- Adjust spacing and height for balance.
7. Spring-Themed Tiered Tray Decor
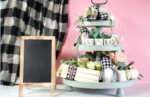
Use your tiered trays to showcase small seasonal pieces like mini signs, faux carrots, bunnies, or birds’ nests. Add touches of greenery or tiny flowers for that springy vibe. Change out pieces easily to refresh your look all season long.
🍋 Spring-Themed Tiered Tray Decor
Supplies:
- Tiered tray
- Mini signs
- Faux carrots, bunnies, nests
- Small greenery sprigs
- Mini vases or figurines
Instructions:
- Start with larger items at the back.
- Layer in medium pieces for balance.
- Fill empty spaces with greenery or mini pieces.
- Adjust until visually balanced.
8. Hand-Painted Wooden Coasters
Brighten up your coffee table with DIY coasters! Use unfinished wooden rounds, paint them in spring pastels, and add floral or monogram designs. Seal them with a clear coat so they’re functional and pretty.
☕ Hand-Painted Wooden Coasters

Supplies:
- Wooden coasters or rounds
- Acrylic paint
- Paintbrushes
- Clear sealant
- Optional: vinyl or stencil designs
Instructions:
- Paint base coat and let dry.
- Add spring patterns or stenciled words.
- Seal with clear spray or brush-on sealer.
- Allow to dry before use.
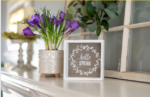
9. Framed Botanical Prints or Quotes

Print out free spring botanical art or hand-lettered quotes and frame them for instant wall refresh. Use light wood or white frames to keep the look fresh and airy. Hang them in your hallway, kitchen, or bathroom for a quick update.
🖼️ Framed Botanical Prints or Quotes
Supplies:
- Free printable art or quotes
- Printer and paper
- Picture frames
- Scissors or paper trimmer
Instructions:
- Print out your chosen designs.
- Trim to fit your frames.
- Insert into frames and hang!
10. DIY Herb Garden for Your Kitchen Window
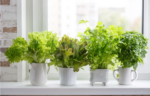
Grow your own mini herb garden in small pots or jars. Basil, mint, and parsley thrive indoors and smell amazing. Label each with a cute hand-lettered tag and line them up on your windowsill for fresh flavor and fresh decor!
🌱 DIY Herb Garden for Your Kitchen Window
Supplies:
- Small pots or jars
- Potting soil
- Herb seeds or small plants
- Plant markers or tags
- Tray for display
Instructions:
- Fill containers with soil and plant seeds/plants.
- Add plant markers or hand-lettered labels.
- Place on tray in a sunny window.
- Water regularly and snip for use!
Final Thoughts
You don’t need to overhaul your whole home to make it feel like spring — just a few creative touches can breathe new life into your space. Whether you try one or all of these crafts, you’ll bring in that fresh, joyful feeling of the season.
🌷 Happy crafting! And don’t forget to share your creations with us at Hard Working Mom — we love seeing what you make!