
Organize in Style: Crafty Storage Solutions You Can Make Yourself
Crafting is fun… until your ribbon stash explodes, glue sticks go MIA, and your vinyl rolls become wild snakes. Sound familiar? We’ve all been there! But organizing doesn’t have to be boring or expensive. In fact, with a little creativity, you can craft your way to a clutter-free space that looks as good as your projects do.
Whether you’re trying to tame your craft corner, conquer the chaos in your closet, or just want pretty storage that works, these DIY crafty storage solutions will help you organize in style!
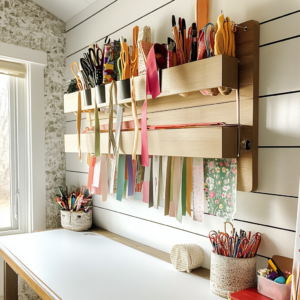
🎨 1. Ribbon Holder from a Paper Towel Rack
Supplies:
- Standing paper towel holder
- Wooden dowels (that fit through the ribbon spools)
- Paint or spray paint (optional)
- Hot glue gun
Instructions:
- Paint your holder and dowels if you want to match your craft room’s aesthetic.
- Stack ribbon spools onto dowels, then place the dowel horizontally across the top of the paper towel holder.
- Secure with hot glue or clips if needed.
Tip: This is perfect for your most-used ribbons!
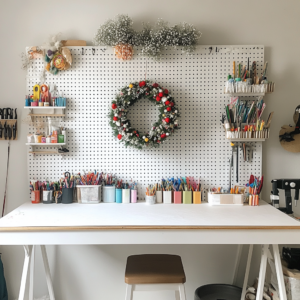
🧵 2. Pegboard Wall for Craft Tools
Supplies:
- Pegboard panel
- Paint (pastel or bright for fun!)
- Hooks, baskets, and shelves
- Mounting hardware
Instructions:
- Paint the pegboard to match your craft room.
- Mount it securely to the wall.
- Add hooks and baskets for scissors, tape, paintbrushes, washi tape rolls, and more.
Why you’ll love it: Keeps everything visible and within arm’s reach!
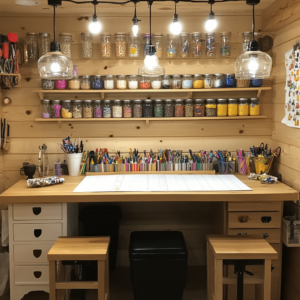
🎀 3. Hanging Mason Jar Storage
Supplies:
- Mason jars with lids
- Screws
- Wood plank or underside of a shelf
- Drill
Instructions:
- Screw the lids of mason jars into the underside of a shelf or a wood plank.
- Fill jars with buttons, beads, or paper clips.
- Screw the jars onto the lids like a twist-and-store magic trick!
Bonus: It’s functional and farmhouse cute.
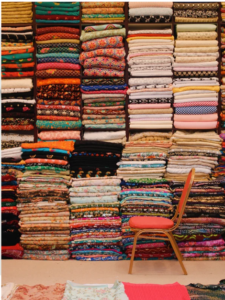
📚 4. Fabric Organizer with Comic Boards
Supplies:
- Comic book boards or cardboard sheets
- Fabric pieces
- Basket or bin
Instructions:
- Wrap your fabric pieces around the boards like mini bolts.
- Stand them vertically in a basket or clear bin for easy access.
No more mystery piles of fabric—just color-coded heaven!
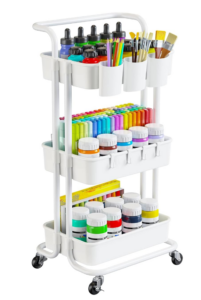
✂️ 5. DIY Rolling Cart Organizer
Supplies:
- 3-tier rolling cart (IKEA or Dollar General finds!)
- Small bins or pencil holders
- Labels or chalkboard stickers
Instructions:
- Fill the cart with categories—top for tools, middle for adhesives, bottom for ribbon rolls or paint.
- Use labels so everything has a home.
- Roll it wherever your craft session takes you!
Perfect for crafters who spread out all over the house (guilty!). You can find the above rolling cart here. I love mine.
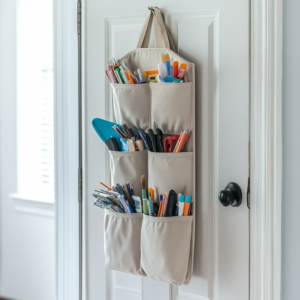
🧺 6. Repurposed Hanging Shoe Organizer
Supplies:
- Over-the-door clear shoe organizer
- Labels
- Small craft supplies
Instructions:
- Hang it on the back of a door.
- Fill each pocket with supplies—glue sticks, Cricut tools, ribbon scraps, markers.
- Label each section for quick grabbing.
Instant vertical storage win!
Tip- Standing shoe racks work great for ribbon storage.
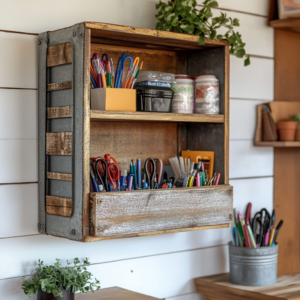
🪵 7. Upcycled Crate Shelves
Supplies:
- Wooden crates
- Paint or stain
- Screws and wall anchors
Instructions:
- Paint or stain your crates.
- Stack and screw them into the wall or each other for shelving.
- Use them to hold paper stacks, storage bins, or floral picks.
Rustic charm + functional flair = a crafter’s dream!
💡 Final Tips for Craft Room Bliss:
- Label everything. Trust me, you’ll thank yourself later.
- Use clear bins so you don’t forget what you have.
- Vertical space is your best friend.
- Decorate while you organize—storage should inspire you!
Ready to roll up your sleeves and turn your chaos into calm? Start small, pick a project above, and slowly bring order to your craft room—one pretty storage solution at a time.