

How to Turn an Evergreen Wreath into an Adorable Halloween Deco Mesh Witch Swag
How to Turn an Evergreen Wreath into an Adorable Halloween Deco Mesh Witch Swag
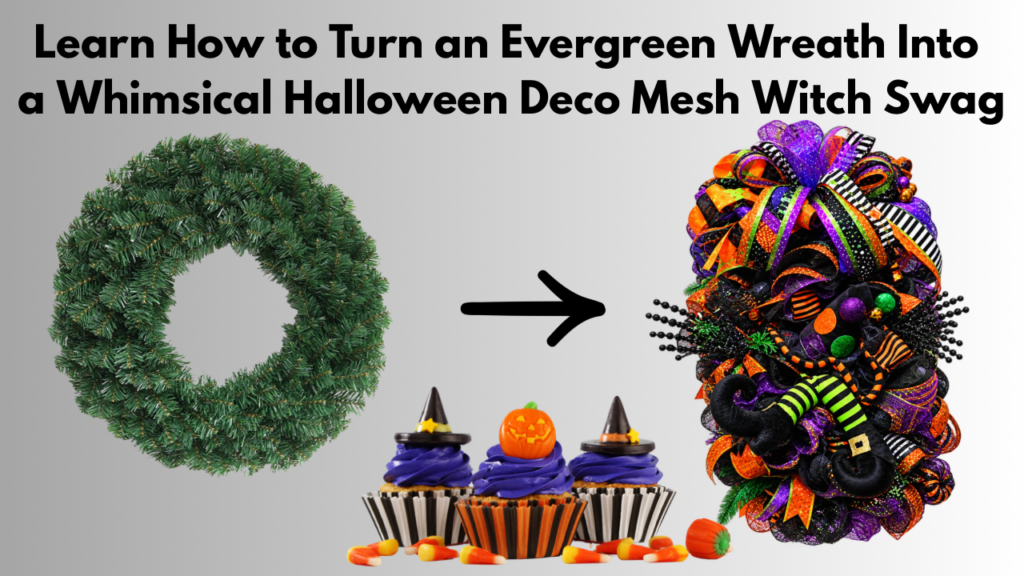
Y’all, I love finding unexpected ways to use basic craft supplies, and this Halloween Deco Mesh Witch Swag is the perfect example! Would you believe this adorable Halloween decoration starts with an ordinary evergreen Christmas wreath?
Evergreen wreaths aren’t just for Christmas. When you find them on clearance after the holidays, stock up because they can be transformed into swags, centerpieces, teardrops, and seasonal decorations throughout the entire year. For this project, we’re taking a basic evergreen wreath, reshaping it into a swag, and filling it with colorful deco mesh, whimsical Halloween ribbons, witch legs, and fun embellishments.
Supplies Needed
- Evergreen wreath with wired branches
- Zip ties
- Ombre Halloween deco mesh
- Coordinating deco mesh
- Assorted Halloween wired ribbon
- Purple jelly ribbon
- Orange and/or purple deco tubing
- Witch legs and witch hat
- Halloween embellishments such as cats, pumpkins, skeleton hands, or picks
- Black pipe cleaners
- Hot glue or glue pot
- Floral tape
- Awl, ice pick, or weaving needle
- Scissors
- Optional bow-making tool
Step 1: Turn Your Wreath Into a Swag
Start with a basic evergreen wreath. Push the sides of the wreath together to create an elongated swag shape. Because the frame is wire, it may take a little muscle! I find it easier to hold the wreath close to my body while pushing it together.
Once you have the shape you want, secure the center with a heavy-duty zip tie. You don’t need several zip ties, the center one should be enough to keep your new swag shape together. Then fluff and reposition the evergreen branches to conceal the zip tie.
Step 2: Add the Deco Mesh
For this Halloween swag, I used a gorgeous ombre mesh featuring red, green, and orange with wide foil.
Cut your mesh into approximately 15-inch pieces. Scrunch each piece through the center to create a ruffle and use the existing evergreen branches as ties to secure your mesh.
Work your way down both sides of the swag. There really isn’t a strict pattern, you simply want the mesh distributed evenly enough to cover the sides and create fullness.
I love adding mesh to evergreen because the greenery provides a sturdy base while allowing the colorful mesh to pop.
Add pieces of your second coordinating mesh down the center. If you’re having difficulty securing mesh in the middle, take one evergreen branch from each side, twist them together to create a tie, place your mesh on top, and secure it.
Step 3: Make a Whimsical Halloween Bow
A big, over-the-top bow makes this swag!
I used several coordinating ribbons featuring purple, black, white, orange, skulls, spiders, stripes, and even jelly ribbon.
For my Lisa Bow, I started with approximately 9- to 10-inch tails and 6-inch loops. The Lisa Bow alternates between two loops on one side and one on the opposite side.
As you add additional ribbon layers, gradually decrease the loops from about 6 inches to 5 inches and finally 4 inches. This creates a beautifully layered bow that’s much easier to fluff.
Finish with jelly ribbon for extra Halloween whimsy, secure the bow with a zip tie, fluff each layer, and attach it toward the top of your swag.
Step 4: Add Ribbon Tails and Deco Tubing
Cut additional ribbon tails approximately 10 inches long and distribute them throughout the swag.
You don’t want these ribbons competing with your statement bow. Their job is simply to add little pops of color throughout the design.
For even more texture, add deco tubing. Make several loops with the tubing, twist them together in the center, and secure them into your evergreen ties. I especially love using inexpensive Dollar Tree tubing for projects like this.
Step 5: Add the Witch Legs
Now comes the really fun part!
Position your witch legs toward the bottom portion of the swag. If your attachment doesn’t already have a way to secure it, carefully use an awl or ice pick to create holes through the back.
Thread black pipe cleaners through the holes and attach them securely to the wreath frame. For heavier attachments, adding a zip tie to the frame creates another strong anchor point.
Step 6: Add Your Halloween Embellishments
This is where you can really give your Halloween Witch Swag personality!
Add little pumpkins, skeleton hands, cats, witch accessories, or other unexpected decorations. I love tucking embellishments right into the bow because it ties the entire design together.
Hot glue smaller pieces directly into the evergreen greenery. The branches provide a wonderful surface for holding glued embellishments securely.
Just don’t go overboard, you still want to see that beautiful mesh, ribbon, and greenery.
A Halloween Decoration With Tons of Personality
And that’s it! An ordinary evergreen Christmas wreath has completely transformed into a colorful, whimsical Halloween Deco Mesh Witch Swag.
One of my favorite things about Halloween decorating is that there really are no rules. Make it colorful, make it whimsical, and don’t be afraid to use unexpected embellishments. Those little surprises are what give handmade designs so much personality.
And remember, when those evergreen wreaths go on clearance, stock up! Once you see how many different seasonal projects you can create with them, you’ll never look at a basic Christmas wreath the same way again.