

Make a Show-Stopping Blue and Orange Fall Wreath With Eucalyptus and Dahlias: Paired With Statement Bow and Cascading Tails
Make a Show-Stopping Blue and Orange Fall Wreath With Eucalyptus and Dahlias: Paired With Statement Bow and Cascading Tails
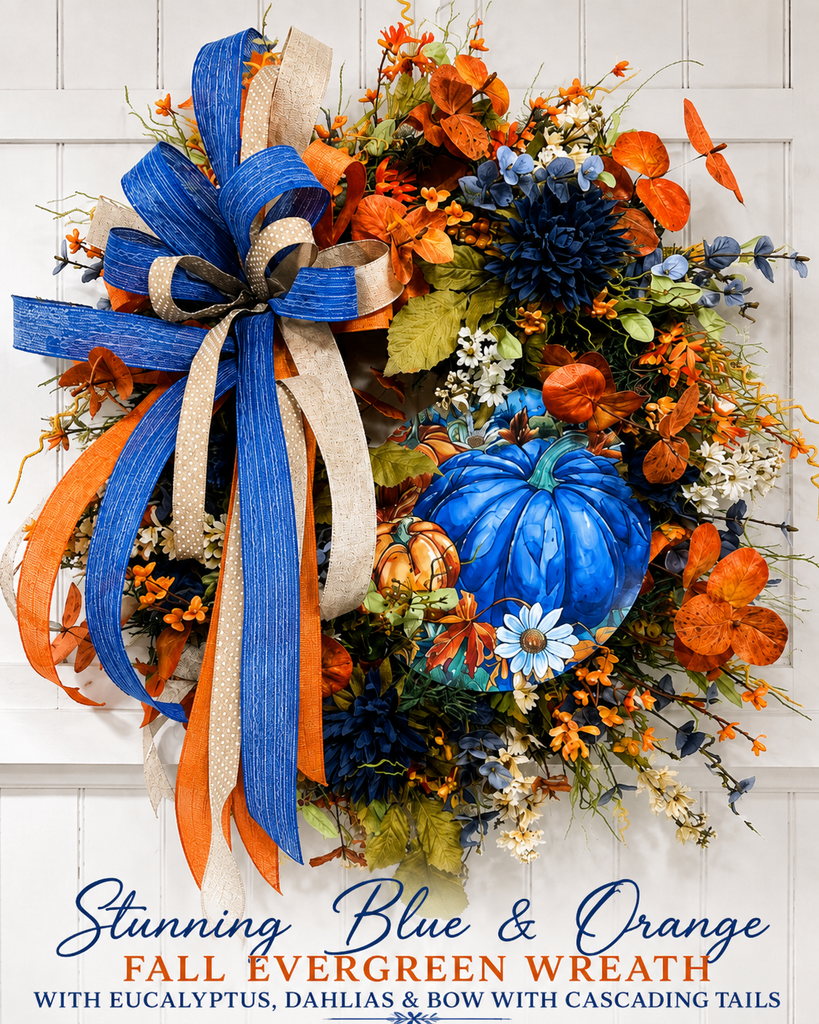
Blue and orange may not be the first color combination that comes to mind for fall, but together they make an absolutely gorgeous statement. This Blue and Orange Evergreen Floral Wreath combines rich autumn tones, soft blue florals, eucalyptus, delicate cream accents, a coordinating sign, and a beautiful bow with cascading ribbon tails.
One of the things I love most about using an evergreen base is how easy it is to build a full floral design. The branches give you plenty of places to secure stems, ribbon, and wire, and they create a broader foundation than grapevine for arranging florals.
Supplies
For this wreath, you will need:
- Evergreen wreath base
- Decorative fall sign in blue and orange
- Blue florals
- Orange florals
- Blue and orange eucalyptus
- Coral grass or mixed fall floral sprays
- Cream or white delicate filler flowers
- Greenery and leaves
- 1.5-inch coordinating ribbon
- 7/8-inch Swiss dot ribbon
- Blue ribbon
- Orange ribbon
- Bow maker
- Floral wire
- Zip ties or pipe cleaners
- Weaving needle
- Wire cutters
- Hot glue or glue pot
- Scissors
Step 1: Choose Your Sign and Color Palette
Start by laying out your sign beside your florals and ribbon.
This helps you decide which shades work best together before attaching anything permanently. For this design, I used a combination of blue, orange, cream, green, and just a touch of white.
When you are shopping for florals, it can be difficult to judge exact colors online. If possible, place several shades together and choose the one that best matches your sign and ribbon.
Step 2: Make the Bow
For this wreath, I wanted the bow to have smaller tails at the top and longer, cascading tails toward the bottom.
Use your coordinating blue, orange, and cream ribbons to create a layered bow. I also included a narrow Swiss dot ribbon because the little touch of white tied beautifully into the sign.
Fluff the bow well, separating each loop so all your colors and patterns can be seen.
Don’t worry about trimming every tail perfectly yet. You can always shorten or reposition them once the bow is attached to the wreath.
Step 3: Shape the Evergreen Base
Before attaching your largest elements, fluff and spread the evergreen branches.
I shaped this wreath slightly oval. If you reshape an evergreen wreath, be careful not to bend the frame too aggressively because you still want it to sit flat against a wall.
Place your sign near the lower portion of the wreath and your bow toward the top.
A good wreath-making rule is to position your largest elements first. Once the bow and sign are in place, it becomes much easier to see exactly how much floral material you need.
Step 4: Attach the Sign
Spread some evergreen branches underneath the sign to create a flat, sturdy foundation.
Use floral wire to secure the sign directly to the wreath frame.
A weaving needle is very helpful here because it lets you guide the wire through the thick evergreen branches and around the metal frame without fighting through all the greenery.
Do not tighten everything excessively at first. Leave yourself enough flexibility to adjust the sign as the design develops.
Step 5: Begin Adding Florals
Cut your floral sprays apart into smaller stems.
I like to work with one type of floral at a time. Add several pieces throughout the wreath, then move to your next variety. Save a few stems from each collection for filling gaps later.
Begin near the bow and work your stems around the wreath.
An important design tip is to keep your florals flowing in the same general direction. Once you establish the movement of the wreath, continue placing your stems so they follow that direction.
Step 6: Layer the Orange and Blue
Build your orange florals first and then begin introducing the blue.
Instead of putting all the blue together, place it near larger concentrations of orange. This breaks up the color and creates better balance throughout the wreath.
Use colored eucalyptus and small filler stems to help blend one section into another.
Allow a few stems to extend slightly beyond the evergreen base. This gives the design movement and makes the wreath look larger and more natural.
Step 7: Add Large Blue Flowers
Nestle your larger blue flowers into the greenery rather than placing them directly on top.
Use leaves around the blooms to make each flower feel like it naturally belongs in the arrangement.
Place some flowers underneath ribbon tails or partially behind the bow. Layering elements like this creates depth and gives the wreath a professional, dimensional appearance.
Step 8: Brighten Dark Areas
When a wreath has several deep colors, photographs can sometimes make those areas blend together.
Add a few cream or white floral accents near darker sections. The lighter color creates contrast and helps define the surrounding florals.
This is especially useful if you sell wreaths online because good contrast allows customers to see the individual details more clearly in photographs.
Step 9: Create Cascading Ribbon Tails
Use leftover ribbon pieces to extend the bow through the wreath.
Pinch the ribbon, twist it around a wired stem or another secure element, and tuck or glue it into the evergreen.
Position these pieces so they look as though they are naturally flowing from the bow.
Add several cascading tails toward the lower section of the wreath. Because wired ribbon is bendable, you can shape the tails into soft curves and waves.
Step 10: Hang and Check Your Wreath
This final step is incredibly important.
Hang the wreath vertically and step back.
When a wreath is lying flat on a table, it can be difficult to see holes or uneven areas. Once it is hanging, gaps become much easier to spot.
Add saved filler stems, move ribbon tails, or reposition greenery until the design feels balanced.
The finished wreath should have a beautiful flow from the oversized bow at the top, through the blue and orange florals, and down into those gorgeous cascading ribbon tails.