

Think Outside the Orange: DIY Pink Pumpkin Fall Grapevine Wreath
Think Outside the Orange: DIY Pink Pumpkin Fall Grapevine Wreath
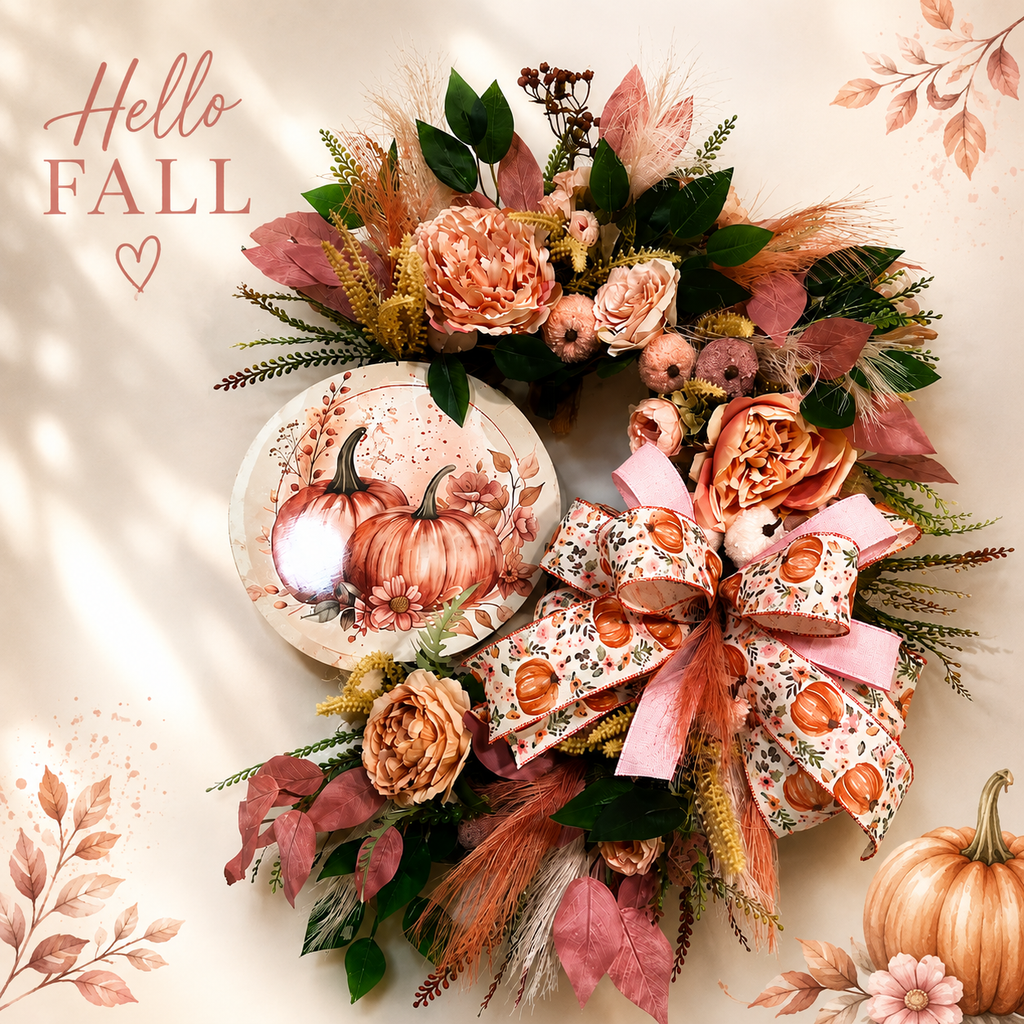
Who says Fall has to be orange, brown, and yellow? Sometimes the prettiest seasonal designs come from using colors that are a little unexpected. This Pink Pumpkin Fall Grapevine Wreath is a perfect example. With soft mauve and pink tones, velvet pumpkins, peonies, ficus leaves, pampas-style accents, and rustic greenery, this wreath still feels completely like Fall, just with a beautiful feminine twist.
For this project, I started with a grapevine wreath and chose the side that had the nicest shape and color to remain visible. I placed the sign on the thinner side of the grapevine so it would help balance the wreath while still allowing plenty of the natural grapevine to show.
The finished wreath is soft, romantic, rustic, and definitely different from traditional Fall décor. If you love pink, mauve, plum, or other nontraditional autumn colors, this is such a fun design to recreate.
Supplies
- Grapevine wreath
- Pink or mauve Fall sign
- Bind wire or vine wire
- Weaving needle
- Zip ties
- Wire cutters
- Scissors
- Hot glue or glue pot
- Floral picks or sticks, if needed
- Green ficus stems
- Pink ficus stems
- Mauve or pink peonies
- Mini pink velvet pumpkins
- Pink and neutral pampas grass
- Assorted Fall greenery
- Small white flowers
- Berry or bead-style floral accents
- Rust, peach, or muted Fall floral stems
- Sheep grass or similar wispy greenery
- Light and dark pink filler stems
- Wired ribbon with subtle pink and green tones
- Solid pink wired ribbon
Step 1: Choose the Best Side of the Grapevine
Before attaching anything, look carefully at your grapevine wreath. One side may be fuller, darker, thinner, or more irregular than the other.
I chose the side with the most consistent color and shape as the portion I wanted to leave exposed. The thinner side became the perfect place for the sign. This is an easy way to work with the natural imperfections of grapevine instead of fighting against them.
Step 2: Attach the Sign
Position your sign slightly toward the lower side of the wreath rather than directly in the center.
Attach it using bind wire or vine wire. A weaving needle makes this much easier because you can weave the wire in and out through the grapevine and hide it naturally among the vines. The wire blends into the wreath and keeps the sign secure without being noticeable.
Once the sign is secure, tuck any loose wire ends back into the grapevine.
Step 3: Make and Attach the Bow
Next, make your bow so you can establish the main focal points before adding florals.
For this wreath, I used a simple 3-2-1 style bow with approximately six-inch loops and longer tails around ten inches. The ribbon had a very subtle pink and green pattern, which worked beautifully because I wanted the pink to feel soft rather than overwhelming. A small amount of solid pink ribbon helped bring out the pink tones in the patterned ribbon.
Secure the bow with a zip tie and attach it near the lower portion of the sign.
Step 4: Build the Greenery Base
Now begin creating your floral line around the sign and bow.
Start by cutting your ficus stems into smaller sections. Most large ficus sprays can be divided into approximately six or seven usable pieces.
Alternate green and pink ficus around the wreath. Allow some of the longer pieces to drape slightly downward to create movement and help elongate the design.
Think of this greenery as your filler base. It creates fullness so you do not have to use expensive flowers everywhere.
Step 5: Add Your Main Flowers
Choose one or two larger flowers to become focal points.
I used a large floral with a mixture of pink, peach, and slightly rusty tones. Place one near the upper section of the design and another lower down, then build around those larger flowers.
Add your peonies, smaller white flowers, berry accents, and other muted Fall florals around them.
Don’t worry about perfectly matching every color. A little peach, rust, plum, or brown helps keep the wreath grounded in the Fall season.
Step 6: Add Wispy Texture
One of the things that makes this wreath special is all the texture.
Add pampas-style stems, wispy grass, sheep grass, or other soft filler pieces throughout the design.
If a stem is too long, don’t be afraid to cut it down. I often pull the foliage back, trim the stem shorter, and then reshape it. You still get the pretty texture without letting one piece overpower the wreath.
I also remove any plastic-looking grass or filler that makes a stem look artificial. Use only the parts you love.
Step 7: Add the Pink Pumpkins
Now it is time for the fun part, the pumpkins!
Remove any sticks or attachments that do not work with your design and use the pumpkin itself. Tuck the mini pink velvet pumpkins throughout the floral arrangement so they peek naturally between the greenery and flowers.
Hot glue can help hold them securely.
Space them around the design rather than lining them up. You want them to look like they are nestled naturally into the florals.
Step 8: Fill Any Gaps and Make Final Adjustments
Step back and look at your wreath from a distance.
If you see gaps, add a small flower, a piece of greenery, or one of your wispy accents. You may also need to shorten a few stems so your focal flowers, bow, sign, and pumpkins remain visible.
The goal is a wreath that feels full and layered without looking overcrowded.
This design proves that a wreath can be very pink and still feel beautifully autumnal. The combination of mauve, muted greenery, rustic grapevine, velvet pumpkins, and touches of peach and rust keeps everything warm and seasonal.
So if you love decorating outside the traditional Fall color palette, give pink a try. Sometimes thinking outside the orange creates the prettiest wreath of all!