

DIY Elegant Deer in Winter Scene Deco Mesh Wreath in Gold and Rose Gold with Double Ruffle and Woodland Ruffle
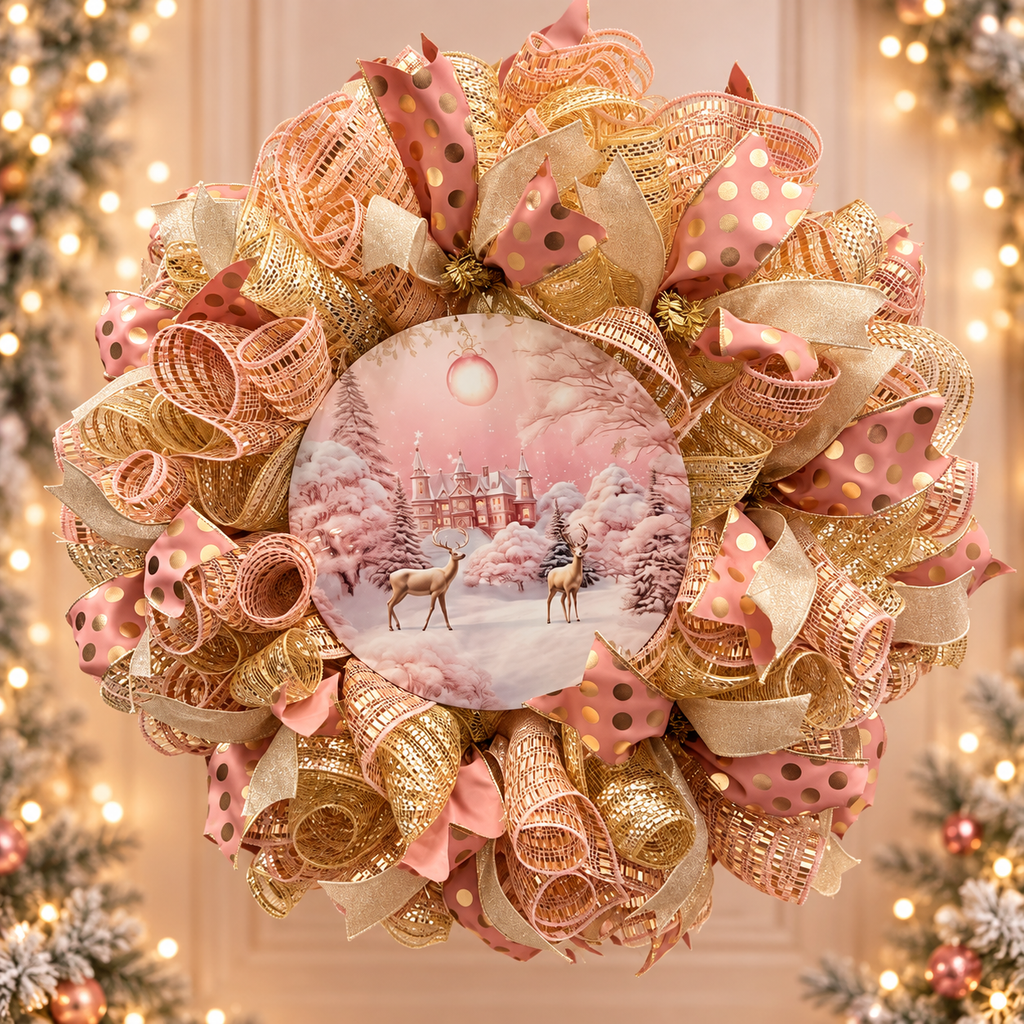
DIY Elegant Deer in Winter Scene Deco Mesh Wreath in Gold and Rose Gold with Double Ruffle and Woodland Ruffle
If you love elegant Christmas decorations that can transition beautifully into winter, this DIY Winter Scene Deco Mesh Wreath in Gold and Rose Gold is the perfect project! The combination of soft rose gold, shimmering gold, and a beautiful winter scene sign creates a sophisticated wreath that looks gorgeous on a front door, porch, or inside your home.
What makes this wreath special is the double ruffle technique, combining a traditional ruffle with a woodland ruffle. This creates incredible fullness using only two colors of deco mesh. And the best part? You don’t need four or five different ribbons to make a beautiful wreath!
For this design, I used a winter scene sign featuring a deer, snow, and an ornament-like decoration. The gold and rose gold colors complement each other perfectly, creating a soft, elegant design that works for Christmas and the entire winter season.
Supply List
- Work wreath frame with ties (tan works beautifully)
- 18 pieces of gold striped-edge deco mesh, cut at 20 inches
- 18 pieces of rose gold striped-edge deco mesh, cut at 20 inches
- Rose gold ribbon with gold polka dots
- Glittery gold wired ribbon
- Additional coordinating gold and rose gold ribbons for the bow
- Winter scene metal wreath sign
- 26-gauge silver floral wire
- Metal hole punch
- Plastic weaving needle
- Bow maker
- Zip ties
- Pipe cleaner
- Scissors or rotary cutter
- Wire cutters
- Deco mesh ruffle tool (optional)
Step-by-Step Instructions
Step 1: Prepare Your Wreath Frame
Start with a work wreath frame and open the ties on the bottom row.
For this wreath, I used a tan frame instead of gold. Here’s a money-saving tip: you don’t need an expensive frame in a matching metallic color! Tan blends beautifully with gold and rose gold, especially once the wreath is full.
Push the top ties toward the center while working on the bottom row to keep everything organized.
Step 2: Prepare Your Deco Mesh
Cut both colors of deco mesh into 20-inch pieces. You will need 18 pieces of gold and 18 pieces of rose gold.
We’re using two mesh pieces in every tie, alternating which color goes on the bottom and which goes on top.
This technique creates a beautifully full wreath without needing additional mesh curls.
Step 3: Create the Bottom Traditional Ruffle
Take a 20-inch piece of gold deco mesh.
Fold the raw edge underneath to hide any fraying, then gather the mesh straight up the middle, creating a traditional ruffle.
This piece will form the bottom layer of your double ruffle.
For the next tie, switch to rose gold on the bottom. Alternating the colors allows both shades to show throughout the finished wreath.
Step 4: Make the Top Woodland Ruffle
Take a 20-inch piece of rose gold mesh.
Roll each end inward to create small curls, then gather the remaining mesh through the center.
Because the mesh is only 20 inches long, keep the curls relatively small so there’s plenty of material left to create the ruffle.
Flip the woodland ruffle over as needed to position the curls attractively, then place it directly on top of your traditional gold ruffle.
You now have two different ruffle styles layered together, creating a gorgeous, dimensional look.
Step 5: Add Your Ribbon Tails
Cut your two coordinating ribbons into 12-inch pieces.
For this wreath, I chose rose gold ribbon with gold polka dots and a beautiful glittery gold ribbon.
Fold each ribbon tail in half to locate the center, pinch it, and run your fingers underneath the wired edges to create a gentle curve.
Place the ribbons on top of the double ruffle and secure everything into the wreath tie.
Spread the ribbon tails apart so both colors remain visible.
Step 6: Complete the Bottom Row
Continue around the bottom row, alternating your mesh colors.
On one tie, use gold underneath and rose gold on top. On the next, use rose gold underneath and gold on top.
As you work, spread the lower ruffles against the neighboring sections. This helps create a full wreath without leaving noticeable spaces.
You’ll quickly see how beautifully the two metallic colors complement each other.
Step 7: Finish the Top Row
Once the bottom row is complete, open the top ties and repeat the same layering technique.
Add your traditional ruffle, woodland ruffle, and coordinating ribbon tails to each tie.
On the top row, be especially careful to spread your ribbons so their patterns remain visible.
When finished, fluff the mesh and adjust any pieces that appear uneven. The double ruffles create impressive fullness using just two mesh colors!
Step 8: Attach the Winter Scene Sign
Use a metal hole punch to create attachment holes in your sign.
Cut approximately 20 inches of 26-gauge silver wire for each attachment point. Double the wire and twist it to keep it secure.
Thread the wire through a plastic weaving needle and push it through the deco mesh to reach the wreath frame.
Wrap and secure the wire around the frame, then repeat for the other attachment point.
Position the sign so it sits slightly nestled into the mesh while still appearing to float above the wreath.
Adjust the surrounding ruffles until the sign is framed beautifully.

Step 9: Create a Matching Gold and Rose Gold Bow
A coordinating bow adds another beautiful decorative element to this design.
I used additional gold and rose gold ribbons to create a layered bow with plenty of dimension.
Start with approximately 12-inch tails and 6-inch loops. Layer your ribbons, making some loops slightly smaller so the different colors and patterns remain visible.
Secure the finished bow with a zip tie and add a pipe cleaner for attaching it.
Fluff each loop individually, working from the center outward.
Instead of dovetailing the tails, try loosely curling them for a softer, elegant appearance.
Step 10: Add the Finishing Touches
Take a final look at your wreath and adjust the mesh and ribbon tails.
You can attach your matching bow directly to the wreath or use it separately on your mailbox, staircase, or another coordinating decoration.
I love creating matching pieces because they make seasonal decorating feel beautifully coordinated without requiring an entirely new project!
Ready to Make Your Own Elegant Winter Wreath?
Isn’t it amazing how two beautiful colors of deco mesh and a few coordinating ribbons can create such an elegant, full wreath?
This design is perfect for anyone who loves gold and rose gold Christmas decorations but also wants something that can stay displayed throughout winter.
Want to make this wreath yourself? Be sure to check out my coordinating signs and ribbon sets at RCL Signs and More! I take the guesswork out of matching colors and patterns by pairing beautiful signs with high-quality coordinating ribbons.
Instead of purchasing multiple separate rolls and wondering whether they’ll match, you can get the sign and ribbon combination already selected for you. My premium-quality ribbon holds its shape beautifully, making it easier to create professional-looking wreaths and bows.
Grab your supplies, put on your favorite Christmas music, and let’s get crafting!