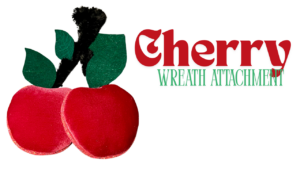
🍒 DIY Cherry Wreath Attachment Tutorial: Sweet & Simple Crafting Fun!
🍒 DIY Cherry Wreath Attachment Tutorial
Looking for a unique way to add a pop of summer to your next wreath design? This cherry wreath attachment is the perfect project! Using affordable materials like foam board, velvet fabric, and fuzzy pipe cleaners, you’ll create a dimensional, plush cherry accent that screams summer sweetness.
Follow along step by step as we walk through how to cut, glue, stuff, and assemble your own cherry attachment, perfect for wreaths, swags, or even standalone decorations!
✂️ Supplies You’ll Need:
- Printable cherry pattern (includes 2 cherries, 2 leaves, and optional stem)
- Foam board (Dollar Tree or Walmart)
- Thin batting
- Stretch velvet or felt (red for cherries, green for leaves)
- Fuzzy pipe cleaners (black or green work well for stems)
- Scissors (not your good ribbon scissors!)
- White pencil (for tracing on dark foam board)
- Glue gun (low temp recommended)
- Poly-fill or stuffing (old pillow works great!)
- Glitter rope, yarn, or velvet ribbon (to finish edges)
- Puffy paint (for leaf veins)
- Clips (to hold pieces together while glue sets)
- Awl or tool to poke holes
🍒 Step-by-Step Instructions:
Step 1: Cut Your Pattern
Start by printing and cutting out your cherry, leaf, and stem templates. Use smaller scissors for accuracy, and don’t worry about perfection; you’ll be covering these later.
📌 Tip: Save your ribbon scissors! Use regular or older scissors to cut foam and felt.
Step 2: Trace & Cut the Foam Board
Trace your cherry and leaf shapes onto foam board. You’ll want two cherries and two leaves. Use a craft knife or foam cutter (preferably one with a grip handle) to cut out the shapes. Cut lightly at first, then go back over for a clean edge. You can find mine here.
Don’t worry about slight imperfections, batting and fabric will smooth them out.
Step 3: Add Batting
Cut a piece of batting about an inch wider than your cherry. This will soften the edges and make applying fabric much easier.
Glue the batting to the front side of the foam cherry using a low-temp glue gun. Smooth it out to remove bumps.
You can choose to do this on both sides, but the front is the priority.
Step 4: Cut & Attach Fabric
Cut your stretch velvet or felt to fit, leaving an extra inch or two beyond the shape. Use low-temp glue to adhere the fabric to the batting side. Stretch and smooth it to avoid wrinkles.
🔴 Pro Tip: For a dimensional look, stuff the front of the cherry with poly-fill before finishing gluing down the fabric. Use your fingers to place stuffing in just the right spots.
Step 5: Assemble the Cherry Pair
Before gluing front and back pieces together, poke a hole through the back cherry with your awl. This is where the pipe cleaner hanger will go. Twist the pipe cleaner in and secure it in place.
Glue the two cherries together, front-facing sides out. Clip them together while drying for the best hold.
Use glitter rope, yarn, or ribbon to cover the edge seam. This gives a clean, polished look and hides any inconsistencies.
Step 6: Create the Leaves
You have two options for leaves:
- Cover foam leaf cutouts with batting and green velvet.
- Glue together two pieces of stiff felt for a faster, easier option.
Use puffy paint to draw simple veins on the leaves. Let them dry completely before attaching.
Step 7: Add the Stem
Choose thick fuzzy pipe cleaners for a bold, plush stem look. Black, dark green, or even brown work well.
Poke a small hole at the top of each cherry and insert the pipe cleaners. You can twist them together to form one connected stem or leave them separate for a looser look.
Step 8: Assemble the Whole Piece
Attach your leaves to the pipe cleaner stems using glue. Position them wherever they look best—at the base of the stem, between the cherries, or slightly offset.
If your leaves are double-layered with stiff felt, they’ll stand upright beautifully!
📌 Optional Finishing Touches:
- Add glitter or rhinestones for sparkle.
- Use fabric markers or puffy paint to draw tiny highlights or accents.
- Personalize the attachment with a name or date using iron-on vinyl.
🧵 Final Thoughts:
This cherry wreath attachment is a fun, budget-friendly DIY project that brings a burst of color and personality to your summer decor. Whether you’re decorating a wreath, swag, or even a centerpiece, this sweet cherry piece is sure to make a statement.
You can reuse the pattern again and again with different colors or sizes to fit any theme!
🛍️ Where to Get Supplies:
Some of the items used in this tutorial, including printable patterns and ribbon sets, are available in my shop at Hard Working Mom. Many of the items used to make this cherry wreath attachment can be found HERE.
📸 Pin It for Later!


