

Super Cute Elf Wreath With Messy Ruffles and Evergreen Base: How to Add Attachments Like a Pro
Super Cute Elf Wreath With Messy Ruffles and Evergreen Base: How to Add Attachments Like a Pro
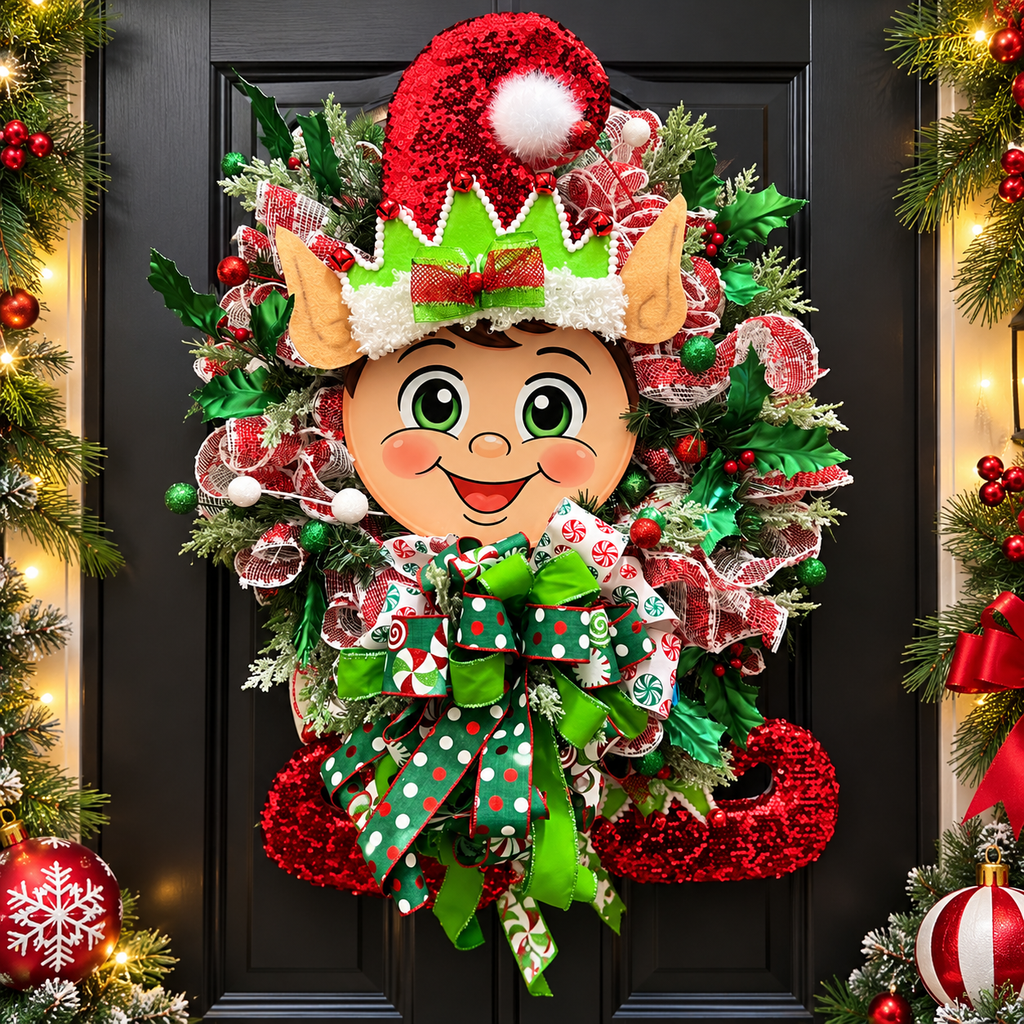
If you love whimsical Christmas decor, this Super Cute Elf Wreath is such a fun project to make. It starts with a 24-inch evergreen wreath base and uses bright mesh, adorable elf attachments, a coordinating elf face sign, a big festive bow, and sparkly Christmas picks to bring everything together. The finished design is playful, full, and perfect for a front door, porch, craft booth, or even a fundraiser donation.
This wreath is especially helpful if you want to learn how to add larger attachments like legs, hats, and character faces. Larger pieces can sometimes overwhelm a wreath, but an evergreen base gives you the fullness and support you need. I chose a 24-inch evergreen wreath because the elf attachment was large, and bigger pieces tend to sit better and look more balanced on evergreen.
Another great part of this design is the messy ruffle mesh method. It is easy, beginner friendly, and does not need to look perfect. The mesh adds color, texture, and fullness while helping brighten up the dark evergreen base.
Supply List
24-inch evergreen wreath base
10-inch Elf Face Sign
Elf legs and elf hat attachment set
Christmas deco mesh cut at 20 inches
26-gauge wire
Pipe cleaners or attachment ties
Plastic weaving needle
Zip ties
Hot glue gun or glue pot
Glue sticks
Bow maker
Scissors or rotary cutter
Wire cutters
Hole punch
Red, white, and green Christmas ribbon
Candy-themed ribbon
Green glitter-edge ribbon
Dark green ribbon
Small Christmas candy picks
Glitter mica ball spray
Frosted cedar picks
Optional bells, berries, or extra Christmas embellishments
Step-by-Step Instructions
1. Fluff the Evergreen Base
Start with a 24-inch evergreen wreath. Before adding anything, fluff the branches by pulling them upward and outward. You do not have to make it perfect, but you do want to open the wreath enough so there is room to add mesh, attachments, and picks.
If you want a wider surface to work on, gently reshape the wreath. I like to press the wreath against my body, grab the opposite side, and gently push it in to create more of an oval shape. This gives the wreath more surface area and helps larger attachments fit better.
2. Add Messy Ruffles
Cut your deco mesh into 20-inch pieces. To make a messy ruffle, tuck the rough edge of the mesh under, then gather it through the center with your hands.
Place the gathered mesh into the evergreen base and use the wreath branches like ties to secure it. Twist the evergreen branches around the center of the ruffle, then fluff the mesh out.
Continue adding messy ruffles around the wreath. This method is very forgiving because it is not supposed to look neat or perfect. The goal is to add color, widen the base, and create fullness. I explain that adding mesh to an evergreen base helps brighten the dark greenery and can also thicken the wreath.
3. Fill in Extra Mesh
Once you have gone all the way around the wreath, use any leftover mesh pieces to fill in bare spots. Add extra pieces where you want more color or where the wreath needs more fullness.
There is no exact placement for this step. Just look for open areas and tuck in mesh until the wreath looks balanced.
4. Attach the Elf Legs
Decide where you want the elf legs to go. For this design, the legs are placed toward the bottom so they hang out and make the wreath longer and more playful.
Use the ties already attached to the elf legs, or add pipe cleaners if needed. Run the ties up through the evergreen frame, then twist them tightly around the frame. Because the legs are padded and thick, they will hold their shape nicely instead of flopping over.
Repeat with the second leg, making sure the legs are spaced evenly.
5. Attach the Elf Face Sign
Punch holes in the elf face sign, one near the top and one near the bottom or side, depending on how it will sit on the wreath. Add 26-gauge wire through the holes.
Place the elf face slightly above the center of the wreath, leaving room underneath for the bow. Thread the wire through a plastic weaving needle, then push it down through the mesh and around the wreath frame. Tie it securely and tuck in the wire ends.
6. Add the Elf Hat
Place the elf hat so it slightly overlaps the top of the elf face. This makes it look like the elf is actually wearing the hat.
Use the attachment ties or pipe cleaners to secure the hat to the wreath frame. A weaving needle can help pull the ties through the mesh and greenery. Make sure the hat is snug, but do not crush the face or surrounding mesh.
7. Make the Christmas Bow
Choose several coordinating ribbons in red, white, and green. Start with a candy-themed ribbon and make about a 9- to 10-inch tail. Create 6-inch loops, twisting the ribbon in the center each time you cross over.
For the first ribbon, make three loops. Add a second ribbon with slightly longer tails and make two loops. Add a third ribbon with one loop for a classic 3-2-1 bow. Then add additional ribbon layers with slightly smaller 5-inch loops so the ribbons underneath still show.
Secure the bow with zip ties. When tightening a thick bow, make sure the front ribbon does not pull toward the back. Keep the center tight, but do not flatten the whole bow.
8. Fluff the Bow
Before attaching the bow, pull all the tails downward and separate the loops. Then fluff one side at a time. Place your hand inside each loop and twist gently back and forth to loosen any ribbon stuck in the center.
Let the loops go where they naturally want to go. This helps create a rounded, full bow without fighting the ribbon.
9. Attach the Bow
Place the bow under the elf face, between the face and legs. Run a zip tie around the wreath frame and tighten it enough to hold the bow in place, but not so tight that it squashes the bow. Keep the bow adjustable so you can center it over the legs.
Curl the ribbon tails and trim any pieces that cover the elf legs. You still want the legs to show.
10. Add Christmas Picks and Sparkle
Now add the fun details. Use small candy picks, glitter mica ball sprays, berries, and frosted cedar pieces throughout the wreath.
Pull apart larger picks and glue smaller clusters into the evergreen. Add some pieces around the bow and even inside the bow loops for extra dimension. Frosted cedar is great for adding sparkle and a snowy look, and a little goes a long way when you separate the pieces.
11. Final Adjustments
Hold the wreath up and look at it from the front. Adjust the legs if they are too close together, move any picks that are sticking out too far, and make sure the elf face and hat are centered.
The finished wreath should look full, whimsical, and festive, with the elf attachments secured like they truly belong in the design. This Super Cute Elf Wreath is a great way to practice using large attachments while creating a fun Christmas wreath everyone will notice.
Want to Make This Wreath?
You can shop the Elf Face Sign used in this project at RCL Signs and More and find the Elf Attachment using the links provided in the supply list above.
Once you have your main pieces, gather your mesh, ribbon, and favorite Christmas accents and have fun creating your own version. Don’t forget to watch the full video tutorial if you’d like to follow along with me step by step.
I’d love to know if you plan to make this Elf Wreath! Leave me a comment and tell me what colors or ribbons you would use for yours.