
Cute and Easy Halloween Bow: Step by Step Instructions
The Halloween season is one of the best times to get creative with your crafting! Here at Hard Working Mom, we have a lot of fun making all sorts of different crafts. One craft idea that has been popular this year is how to make a bow for Halloween. We even created a step-by-step tutorial to help you out.
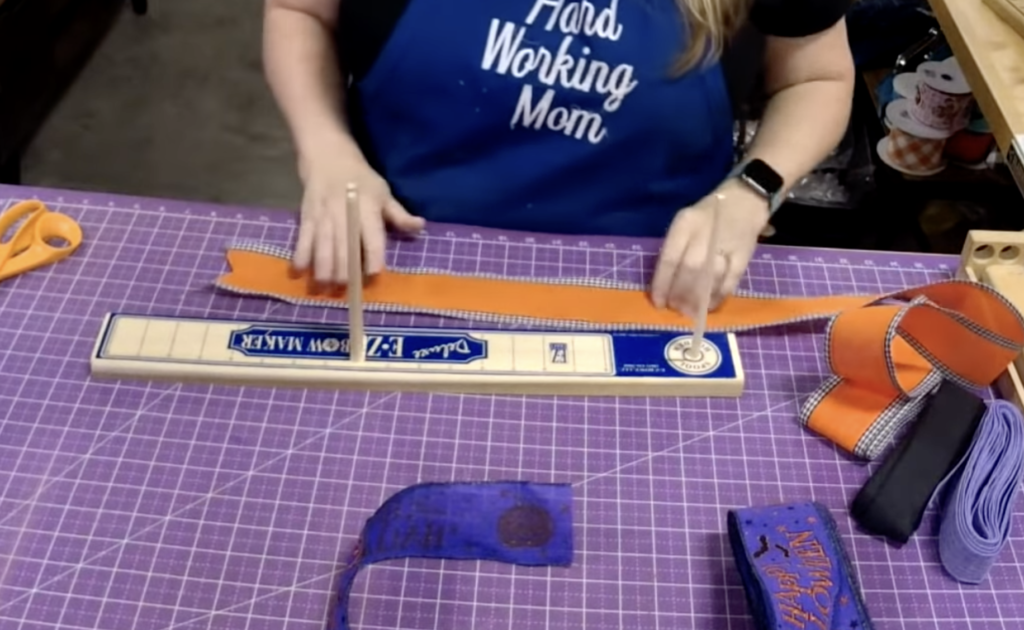
When making a bow I always use wired edge ribbon you can find this ribbon in my shop here. I generally will pick 3-4 different ribbons you can always do more I like to stay with the 3-4 range. I love access patterns for Halloween. And then I have a purple and a black and this orange ribbon.
We will start by deciding how many loops we want of each ribbon, on this bow we will do one loop on each side, and alternating and layering. We’ll do it all the first time with one length and all the second time with a different length. Alright, so this is kind of like the five ribbon bow with different layers to these tails.


To start I will find a 10″ inch mark to do a tail and insert that into my bow maker. All my loops are 6″ in total. What I do is pinch my ribbon in the middle and place it into my bow maker. Then I take it and fold it over to create the loop and pinch it into the bow maker again. We will repeat these steps by having one loop on each side.
After starting the bottom of the bow I will continue and add ribbon to this and create those layers to it. When a ribbon has a pattern you will want to make sure they are all going in the same direction. You can do this in different ways to can make the bow by hand or you can simply turn the loop inside the bow maker.
Okay, we’re going to take this piece right here. And we’re going to take the entire loop and flip it over. So right there, where it meets the bow maker you just flip it over. Alright, so we’ve got layer one. And what we’ll do is we’ll kind of pull these like back and forth & continue again with the same ribbon pattern but doing our loops at 5″ inches vs the 6″ each ribbon is only getting one loop on each side, this will make a nice, fluffy bow.
So don’t think just by watching me that you can’t do it. Because I promise you that you can. I really struggled in the beginning. I did. And it’s like, it’s kind of like riding a bicycle. To me. That’s what it’s like. Like once you have it, you got it. Right but it’s kind of that you just kind of have to figure it out as you go along
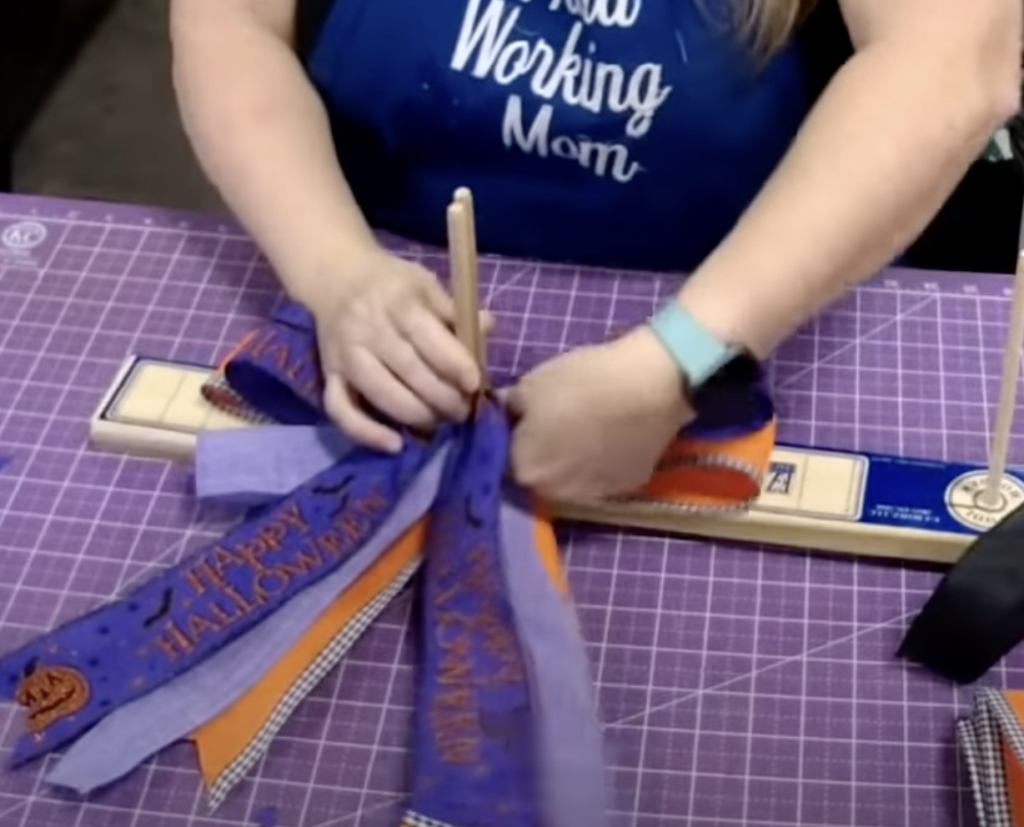
An important part of bow-making is making sure that you have a good center. I think this is going to go on my mailbox so I will be using the rustic wire 18″ gauge that has a twist of jute around the wire which makes it super thick. Tip on the wire the higher the gauge the thicker it is.


I will take my zip tie and stick it under my bow maker and get it as close to that center as possible. Then before zipping It all the way I will thread my other wire through it and then pull tight. I will want to fluff my bow out and make sure that all the loops are fluffy and the tails are nice and not all intertwined. #breakthebow
At the end you can see how we can see the zip tie in the front of the bow, to fix this issue we will just take some of our extra ribbons and cut them, and hold them to make a cover for that center. You don’t need much and if it helps you can fold the ribbon in half and then place it over and just tie it to the back of the bow. You can cut off any extra ribbon from the back.
That’s it you have your very own Halloween Bow perfect for mailboxes, lanterns! Don’t forget to check out the video on YouTube, and follow me on Socials for more tips.