DIY Rustic Wooden Pumpkins – A Charming Fall Craft Project
DIY Rustic Wooden Pumpkins
If you’ve got a few scrap 2x4s lying around and a love for cozy fall décor, you’re going to love this simple and budget-friendly DIY. Today, I’m sharing how to make wooden pumpkins from leftover wood, giving them a rustic, farmhouse feel perfect for your autumn display. With just some paint, a few sticks, and a little creativity, you can create a whole pumpkin patch for your mantel, porch, or table centerpiece.
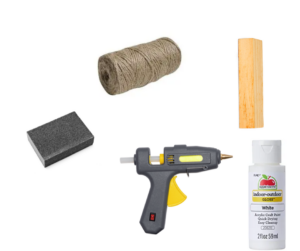
Supply List

- 2×4 wood scraps (various lengths – I used 6″, 5.5″, 4″, and 3″ for variety)
- Small tree branches or sticks for stems
- Sandpaper or sanding block
- Dark brown acrylic paint
- Orange acrylic paint (or teal, cream, burgundy – whatever matches your décor)
- Baby wipes or damp paper towels
- Chip brush or other rough-bristled brush
- Fall florals, leaves, berries, or wheat stems
- Raffia or ribbon for bows
- Wood glue (Titebond or similar)
- Drill and drill bit (slightly smaller than stick diameter)
- Hot glue gun and glue sticks
- Scissors or wire cutters
Step 1: Prep Your Wood
Gather your scrap 2×4 pieces in different lengths to create visual interest. Sand each piece with a sanding block to remove rough edges and splinters. This will help your paint go on smoothly and prevent snagging when handled.
Step 2: Create a Stained Base
Instead of traditional wood stain, use dark brown acrylic paint and baby wipes (or damp paper towels) for a quick, mess-free stain effect.
- Dip the baby wipe into the paint and wipe it across the wood surface.
- Wipe off any excess with a paper towel.
- Apply thicker and leave longer for a darker look, or wipe more quickly for a light, rustic tone.
- Let dry completely.
This technique dries quickly and gives you that farmhouse pumpkin décor vibe without the hassle of oil-based stains.
Step 3: Add the Pumpkin Color
Once your “stain” is dry, paint over it with your chosen pumpkin color. I used orange for a classic autumn look, but teal pumpkins, white pumpkins, or even burgundy pumpkins work beautifully for a custom palette.
- Apply one or two coats, depending on how bright you want the color.
- Leave some of the brown showing through for a distressed, rustic feel.
- Skip painting the bottom so your pumpkins sit flat.
Step 4: Dry Brush for Texture
For extra dimension, dry-brush more brown paint over the orange.
- Use a chip brush, load it lightly with paint, then pounce most of it off on scrap paper.
- Lightly drag the brush across edges and corners to highlight natural wear areas.
- Wipe off excess if needed with a baby wipe.
This gives your wooden pumpkins that charming rustic fall décor finish.
Step 5: Distress with Sanding
Using a sanding block, lightly sand the edges and corners of each pumpkin. This reveals the brown base coat and even some raw wood underneath, enhancing the distressed look.
Step 6: Drill Stem Holes
To secure your stems:
- Find the center of the top of each pumpkin.
- Drill a shallow hole slightly smaller than your stick diameter.
- If needed, sand the end of the stick so it fits snugly.
Step 7: Attach the Stems
- Apply wood glue inside the drilled hole and on the end of the stick.
- Press the stick into place and let dry.
- Keep a little bark on the stick for texture, or sand it smooth for a cleaner look.
Step 8: Decorate Your Pumpkins
Now comes the fun part – decorating!
You can use fall leaves, berries, wheat stems, raffia, or ribbon to add a personal touch.
- Cut leaves and stems from a floral bush using wire cutters.
- Attach with hot glue or staples.
- Wrap raffia around the stem for a rustic bow, or tie a ribbon for a softer look.
- Use hot glue to hide staples with extra leaves or berries.
Step 9: Personalize (Optional)
If you want to add a festive touch, use a paint marker to write seasonal words like “Fall,” “Welcome,” or “Harvest” on the front of your pumpkins.
Step 10: Display Your Wooden Pumpkin Patch
Arrange your pumpkins in a group for a cozy fall display. They look adorable on a mantel, as a table centerpiece, or even on your front porch. Mix different sizes and colors for a more dynamic look.
Tips for Success
- For budget-friendly supplies, check Dollar Tree for florals, raffia, and ribbon.
- Mix colors; try a teal and cream pumpkin display for a farmhouse-chic look.
- Don’t skip the sanding – it really makes the pumpkins look naturally weathered.
- Use scrap wood to save money and make this an eco-friendly fall craft.
Why You’ll Love This Project
This DIY wooden pumpkin craft is:
- Beginner-friendly – perfect for a weekend craft.
- Customizable – choose your colors, stems, and embellishments.
- Budget-conscious – uses scrap wood and affordable craft supplies.
- Reusable – your pumpkins will last for many fall seasons to come.
Whether you’re crafting for yourself or making gifts for friends, these rustic pumpkins are a charming addition to your fall decorating.

