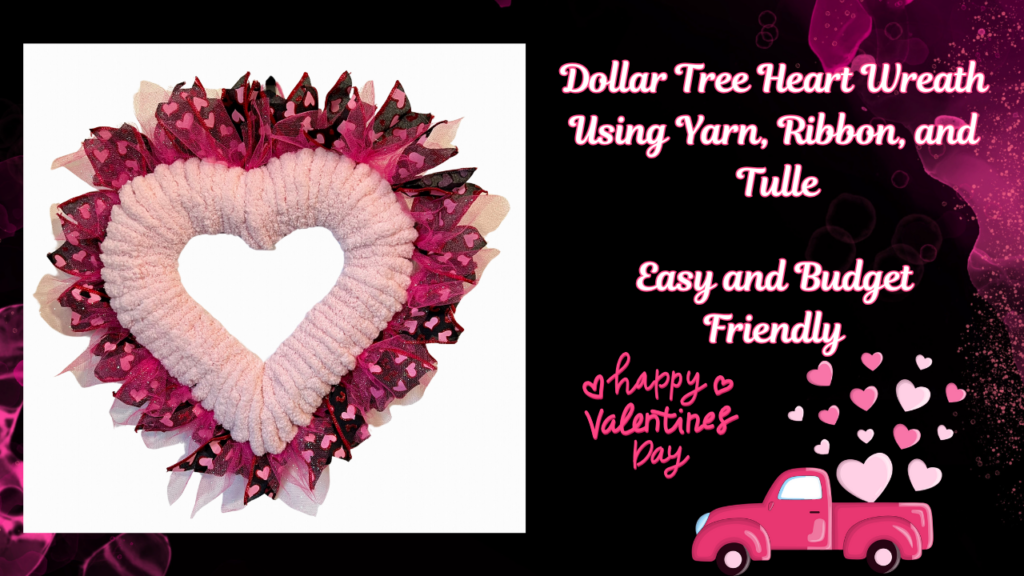
Dollar Tree Heart Wreath
Heart Wreath DIY
Looking for a fun, affordable, and stunning way to decorate your home or gift a handmade treasure? This Dollar Tree Heart Wreath DIY is the perfect project for you! Using simple materials like fuzzy yarn, pretty ribbon, and tulle, you can create a Pinterest-worthy wreath on a budget. Whether you’re a seasoned crafter or trying your hand at DIY for the first time, this step-by-step guide will walk you through the process with encouragement and practical tips.
Grab your craft supplies, set up your workspace, and let’s get started!
What You’ll Need
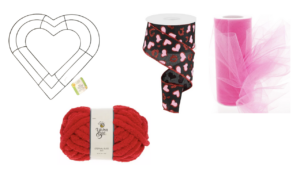
Before we begin, gather the following materials (all available at your local Dollar Tree or craft store):

- Heart frame (check the Dollar Tree for heart-shaped wire frames)
- Thick yarn (in colors like pink, white, or red)
- Ribbon (we recommend wired ribbon for easy shaping)
- Tulle (optional, for texture and layering)
- Hot glue gun with glue sticks
- Clear rubber bands
- Foam board (optional for the backing)
- Microfiber cloth or felt (optional for finishing touches)
- Scissors
- Exacto knife
Optional but helpful tools:
- Ruler or measuring tape
- Awl or hole-punch tool
Now that you have everything ready, let’s start crafting!
Step 1: Preparing the Yarn
Begin by covering the inside of your heart frame with yarn. This will create a soft, cozy base for the wreath.
- Cut a manageable length of yarn to work with (smaller sections make wrapping easier).
- Flip your frame over and secure the yarn to the metal bar at the bottom using a dab of hot glue. Hold it in place for a few seconds to ensure it sticks.
- Start wrapping the yarn tightly around the frame, working your way around the heart shape.
- Add a small drop of glue every few inches to keep the yarn in place, especially when working around corners.
Continue until the inside of the frame is fully wrapped. If you run out of yarn, just secure the end with glue and start a new section. Pro Tip: Use brighter yarn for a bold look or softer pastels for a romantic vibe.
Step 2: Cutting the Ribbon and Tulle
Next, we’ll prepare the ribbon and tulle for your wreath bundles. These bundles will add dimension and beauty to your finished design.
- Measure and cut your ribbon into 8-inch pieces.
- Fold the ribbon multiple times to save time, then cut and dovetail the ends (fold the ribbon in half and cut at an angle towards the wired edge for a polished finish).
- If using tulle, cut it into 8-inch squares using the same technique.
Pro Tip: Mix and match different colors and patterns of ribbon and tulle for a vibrant, eye-catching design.
Step 3: Making the Bundles
Bundles are the core decorative element of your wreath. Here’s how to make them efficiently:
- Lay a piece of ribbon flat. Add a tulle square on top, pinching them together in the center like a flower petal.
- Secure the bundle with a small rubber band to hold the materials snugly together.
- Repeat until you’ve made enough bundles to cover the outside of your heart frame (around 20-30 bundles, depending on how full you want your wreath to look).
Feel free to create some bundles with tulle in the front and ribbon in the back for extra variation in texture.
Step 4: Wrapping the Outer Frame
Now, it’s time to wrap the outside of the heart frame with the ribbon.
- Begin at the bottom of the frame and glue one end of the ribbon to the metal bar.
- Wrap the ribbon tightly around the frame, applying glue every few inches to secure it.
- Continue wrapping until the entire outer edge of the frame is concealed.
This step adds a polished finish to your wreath and provides the perfect base for attaching the bundles.
Step 5: Attaching the Bundles
Now for the fun part—decorating your wreath!
- Take each bundle and pinch it in half to create a fuller, layered look.
- Glue the bundles onto the wreath, starting at the bottom and working your way around. Arrange them so they slightly overlap for a seamless, fluffy effect.
- For extra security, you can use zip ties or additional glue between bundles to keep everything in place.
Take a step back as you work to ensure even spacing and balance around the heart shape.
Step 6: Adding the Backing (Optional)
If you’d like to make your wreath sturdier and prevent any flopping, adding a backing is a great idea.
- Place your heart frame onto a foam board and trace the outline with a pencil.
- Use an Exacto knife to cut out the shape. If needed, sand any rough edges with a small sanding block.
- Cover the foam board with a microfiber cloth or felt for a clean and professional look, gluing the fabric down securely.
- Attach the foam backing to the heart frame using hot glue, making sure all the bundles stay in place.
Step 7: Finishing Touches
With your beautiful wreath almost complete, take a moment to add any final touches.
- Add a small ribbon bow at the top or bottom for an extra touch of charm.
- Attach a loop of yarn or ribbon to the back for easy hanging.
- Check that all your bundles are secure and make any necessary adjustments.
Your stunning Dollar Tree Heart Wreath is now ready to display!
Why You’ll Love This Project
This simple and budget-friendly DIY project is perfect for sprucing up your home decor or making a heartfelt gift. Plus, it’s a great way to get creative with affordable materials!
Whether you’re hanging it on your front door, gifting it to a loved one, or using it as a centerpiece, this wreath will brighten any space.
Show Us Your Creation!
Try this Dollar Tree Heart Wreath DIY and let your crafting skills shine! Share your finished design with us on social media—tag us with #MyDollarTreeWreath for a chance to be featured.
Happy crafting, and stay inspired!
Meta Data
Meta Title
Dollar Tree Heart Wreath DIY – Affordable & Stunning Craft
Meta Description
Make a beautiful Dollar Tree Heart Wreath DIY with yarn, ribbon & tulle! Perfect for home decor or gifts. Clear step-by-step guide for all skill levels.

