How To Make A Ruffle St. Patrick’s Day Wreath
Method:
Ruffle
Supplies Needed:
Get Supplies Trendy Tree- https://bit.ly/350JHZO
- Gnome Love Sign https://hardworkingmomstore.com/produ…
Ribbon-
- 2.5in Leopard print dot ribbon
- 2.5in Green and black ribbon
- 1.5 in Leopard print ribbon
- 1.5in Green with black swirls ribbon
Steps:
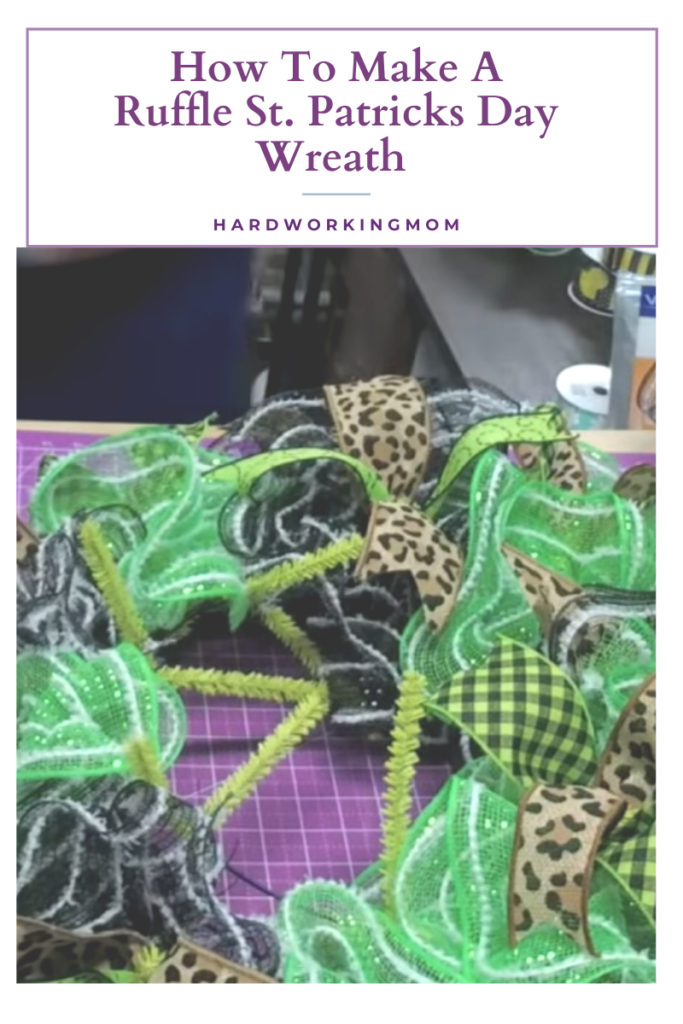
Begin by cutting your mesh to 30 inches. Place one piece of green mesh curl facing down. Use your thumbs to ruffle and pinch in the middle. Hold in place with a tie on the bottom level.
Next, alternate mesh now using the black snow mesh. Repeat the previous step and place it within the next tie.
I’m going to go ahead and cut my ribbon to 12 inches and tie in my ribbon also before I get too many ruffles on. I’m using the 2.5 in green checker ribbon with a 1.5 in leopard print ribbon on top and placing that combo with one ruffle. My next ribbon combo is the 2.5-inch leopard ribbon with the dotted green 1.5-inch ribbon on top.
Continue alternating mesh and ribbon combinations around the wreath and onto the next level. Don’t forget to cut off the excess tie with wire cutters.
For my oversized bow, check out the ProBow Hand Maker that I love! I used the 2.5-inch leopard ribbon and the 2.5-inch green checker ribbon. Use pipe cleaners to hold together in the middle and place on a single rung on your wreath to the side.
To add my sign I’m going to use my hole punch to punch holes in all four corners of the sign. Run a single piece of wire through each hole in your sign, pull the wire through your wreath, and tie it to the wreath levels to hold in place.
Enjoy!
To see the full tutorial video, visit The Hard Working Mom on youtube, and don’t forget to subscribe!