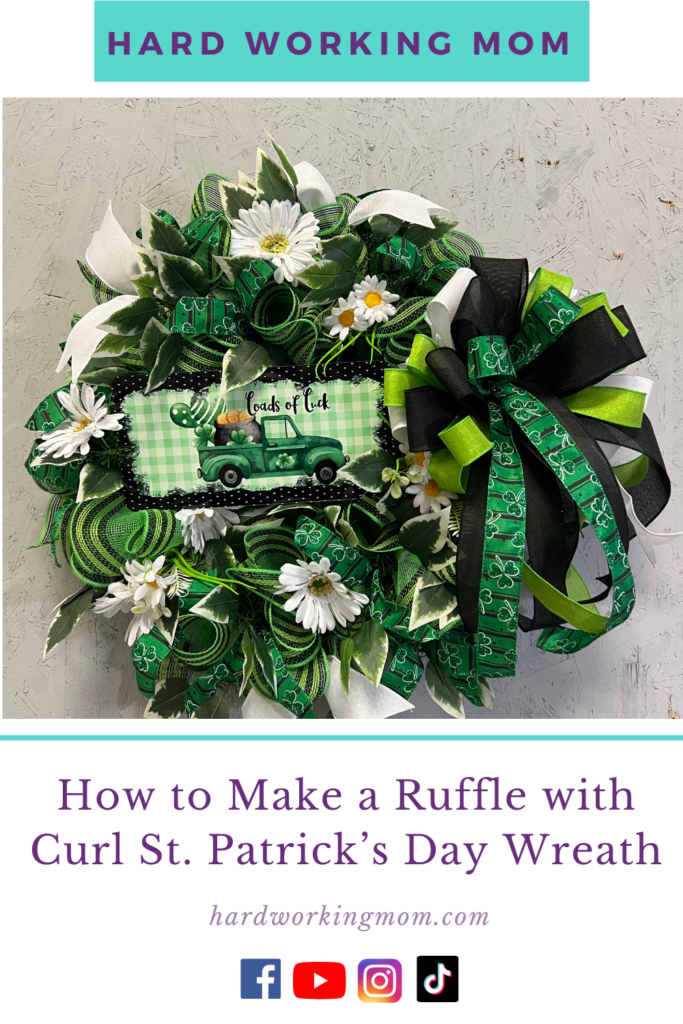
How to Make a Ruffle with Curl St. Patrick’s Day Wreath
Get ready to decorate in Irish style with my How to Make a Ruffle with Curl St. Patrick’s Day Wreath YouTube tutorial. The video will be attached below and this post will walk you step by step to help you create this beautiful wreath yourself.

How to Make a Ruffle with Curl St. Patrick’s Day Wreath
Supplies
To get started, you’ll need to have the following supplies on hand:
- St. Patrick’s Day Kit
- Deco Mesh (green and burlap)
- Ribbon (one burlap, 2 St. Patrick’s themed, and green check)
- Scissors or Roller Cutter
- Cutting Mat
- Mesh Roll Holder
- Circular Wire Wreath Form with Ties
- Ribbon Ruler
I also use Option 3 on the instructions, which is a 30” ruffle with 8” curls.
Directions for Making the Wreath
1. Start by cutting nine 30” pieces of the deco mesh and burlap. I cut them together to make the process much easier and quicker.
2. Once you have the nine cut, then you’re going to cut about ten or eleven 8” curls. This will use the majority of both rolls.
3. Cut the ribbon in 12” increments until you get a total of 9 for each ribbon. I also like to cut my ribbon together to save some time. Keep the excess ribbon as we’ll be using it to make a bow.
4. After the ribbon has been cut, fold it in half and cut diagonally toward the wire to get a dovetail.
5. Open the ties around the outermost part of the wreath form. Leave the ones on the top down/closed.
6. Separate your mesh, tuck the edge under just a little bit, and go straight up the center bunching (or gathering) the piece together as you go. The finished product will resemble a bowtie shape.
7. Place the bunched mesh onto the wreath form and secure it where it has been bunched (in the middle) with one of the twist ties.
8. Repeat this step with another piece (either green or tan). Bunch the pieces together where they touch to create a full look.
9. Once you have two placed onto the wreath form, grab one tan 12” piece to go in with the green and a green 12” piece to go in with the tan.
10. Then, grab the green stripe and tan ribbon pieces and pinch them in the center at the halfway mark. Place it with a 12” piece and connect them to the center of the 30” piece.
11. Repeat the previous step using the other two ribbon pieces, the 12” mesh piece, and attach it to the other 30” mesh piece.
12. Continue the previous 5 steps around the outer part of the wreath form.
13. Once the outermost edge (the bottom) has been completed. Repeat the steps for the innermost part (or the top) of the wreath form.
***Tip: You can fluff the wreath as you go, but definitely give it a good fluff before adding the bow. Keep reading to learn how to make the bow for this wreath.
How to Make the Bow
Using a bow-making tool, you will:
1. Start by putting the green and white striped ribbon on the bottom, giving it an 8” tail.
2. Create a 6” loop, one on each side.
3. After you have created two loops on each side, trim the bottoms of the tails to create dovetails.
4. Then, spread out the loops.
5. Go in with the tan ribbon and create a slightly longer tail and form just one loop on each side. Again, cutting the ends to match the other ribbon.
6. Go in with the clover ribbon and create two 5” loops on both sides.
7. End with the green and white check ribbon, creating 5” loops on both sides.
8. Use a zip tie to LOOSELY tie the ribbon pieces together in the middle. (You don’t want to pull it too tight until it’s positioned correctly and the next step is completed.)
9. Run a pipe cleaner through the backside of the zip tie so it can easily attach to the wreath. Then, pull the zip tie tight.
10. Pull and twist the ribbon pieces to fluff out the bow. Start at the bottom and work your way to the top.
11. Tie the bow onto the wreath using the pipe cleaner.
Attaching the Sign
When attaching the sign to the wreath, you’ll want to start by punching a hole on each side. Cut two pieces of 20 gauge wire (each piece about 26” in length) and run them through the holes you put in the sign. Twist the wire right where it meets the sign to keep it in place.
Feed one of the wires through the backside of the wreath and twist it around 2-3 times to attach it. On the other side, use a weaving needle to pull the wire through the mesh to the base so you can attach it with 2-3 twists.
Turn the wreath over and make sure everything is secure. Trim off any excess you may have. And you’re done!

