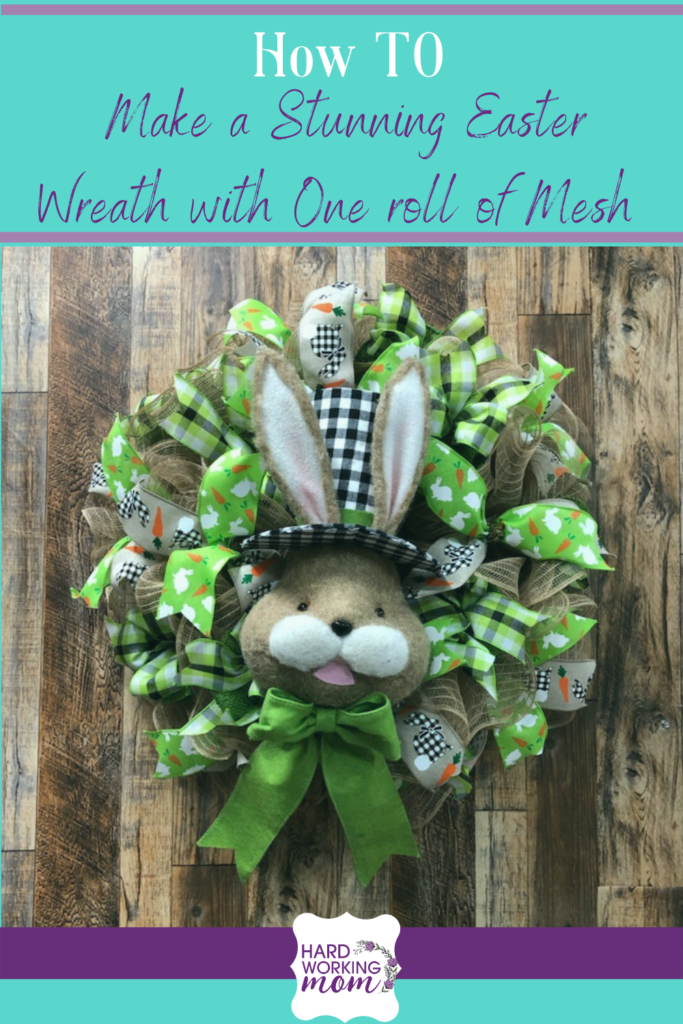
How To Make A Stunning Easter Wreath With One Roll Of Mesh
Method: 20in Ruffles
Ribbons cut -12
Mesh cut – 20in
SUPPLIES
Most supplies can be found at Trendy Tree or Hardworkingmomstore.com
Get Supplies Trendy Tree- https://bit.ly/350JHZO
Mesh https://hardworkingmomstore.com
15in Burlap work wreath frame
Bunny from Carolina Pottery
Ribbon
- 2.5in green carrot bunny ribbon
- 2.5in Green white and black checked ribbon
- 2.5in Tan with black and white bunny ribbon
STEPS
Begin by cutting your burlap mesh into 20-inch sections. I use my favorite rotary cutter because of its sharp blade and ability to be super precise!
Cut the green mesh into 10-inch sections.
Start by turning over your mesh so that the ends that tend to curl point down. Scrunch up the mesh down the middle with your thumbs as if to make a bow tie. Grab in the middle of the ruffle and place in a tie in the bottom rung of your wreath form. Continue placing ruffles on the top rung as well.
Cut the green plaid into 24 in sections to create your mini bows and cut the other two designs of ribbon into six-inch pieces.
I grabbed a combination of two ribbons (carrot/bunny burlap and green plaid) placed them on top of one another and pinched them in the middle to place in a tie on the workwreath. Be sure to trim the access pipe cleaner! I also used the green plaid ribbon cut into 24 inches to create small bows to alternate within the ties of the work wreath. Use a Bowdabra to make creating the perfect bow a breeze!
Now, let’s tie in our Easter bunny!
To secure the bunny I used a greenery pick that I cut in half. The back of the bunny is styrofoam so I tied pipe cleaner around the end of the pick and inserted it into the back of the bunny in an upwards angle. Use glue to secure in place.
The top of the bunny has a jute rope in the top to hang but I use it to run it through the back of the work wreath and tie around a rung. I also tie the pipe cleaners we added to the back to the rungs of the wreath.
You can also add greenery, Easter eggs, more bows, etc!
Check out the video tutorial here:
Don’t forget to tag Hard Working Mom in your wreaths on Facebook & Instagram using @hardworkingmom & @hardworkinglori