
How to Use Scrap Deco Mesh in a Bow: Make Bigger, Fuller Bows for Less
How to Use Scrap Deco Mesh in a Bow: Make Bigger, Fuller Bows for Less
If you love making big, beautiful bows but don’t love how quickly expensive ribbon disappears, this lesson from the Summer Bow Master Class is going to be one of your favorite money-saving tricks!
One of the easiest ways to make a bow look larger and fuller without adding a lot of extra ribbon is to use scrap deco mesh. Most of us have little pieces of mesh left over from wreaths, swags, or other projects, and instead of tossing those scraps into a bin, you can turn them into extra volume for your bows.
This technique works especially well for large wreath bows, lantern bows, door hanger bows, and oversized decorative bows.
Supplies
You will need:
- Scrap deco mesh
- Wired ribbon in coordinating colors
- Solid ribbon
- Patterned or seasonal ribbon
- Focal ribbon
- Zip tie
- Bow maker or bow-making board
- Scissors
- Optional deco mesh ribbon
- Optional inexpensive coordinating ribbon
One of the best parts about this bow is that your deco mesh may cost you absolutely nothing if you are using scraps from another project!
Step 1: Prepare Your Scrap Deco Mesh
There are two easy ways I like to use scrap deco mesh inside a bow.
You can make deco mesh curls, or you can create what I call a messy ruffle.
For a messy ruffle, take your piece of scrap mesh and tuck the raw edge slightly underneath. Begin gathering or scrunching the mesh through the center until you have a loose ruffle.
Don’t worry about making it perfect. The purpose of the mesh is not necessarily to be seen as a major decorative element. Its job is to sit behind the ribbon and create fullness.
Add several messy ruffles if you want an especially large bow.
Step 2: Add the Mesh to the Back of the Bow
Place your deco mesh pieces toward the back of your bow.
This is where the magic happens!
By adding something lightweight and inexpensive behind your ribbon loops, you’re creating the illusion of a much larger bow without actually using yards and yards of ribbon.
A small amount of deco mesh can fill empty spaces between ribbon loops and help everything spread outward.
If you’re using a zip tie to secure the bow, slide the zip tie underneath your bow maker before you begin adding too many layers. This makes it much easier to secure everything later.
Step 3: Begin Adding Ribbon
Start with your ribbon toward the back of your bow.
For this example, you can begin with approximately a 12-inch ribbon tail and make loops measuring around 6 inches.
When working on a bow maker, one little trick makes it much easier to check your loop size.
Place your finger where the ribbons meet the bow maker pegs and pull both loops upward. You can quickly compare them and see whether they’re approximately the same size.
This is especially helpful when you’re using several different ribbons and can no longer easily see the measurements on your bow-making board.
Step 4: Mix Patterns and Solids
Don’t be afraid to mix patterns.
You can place polka dots next to florals, seasonal patterns, stripes, or solids. They do not have to be identical.
The important thing is that the colors coordinate.
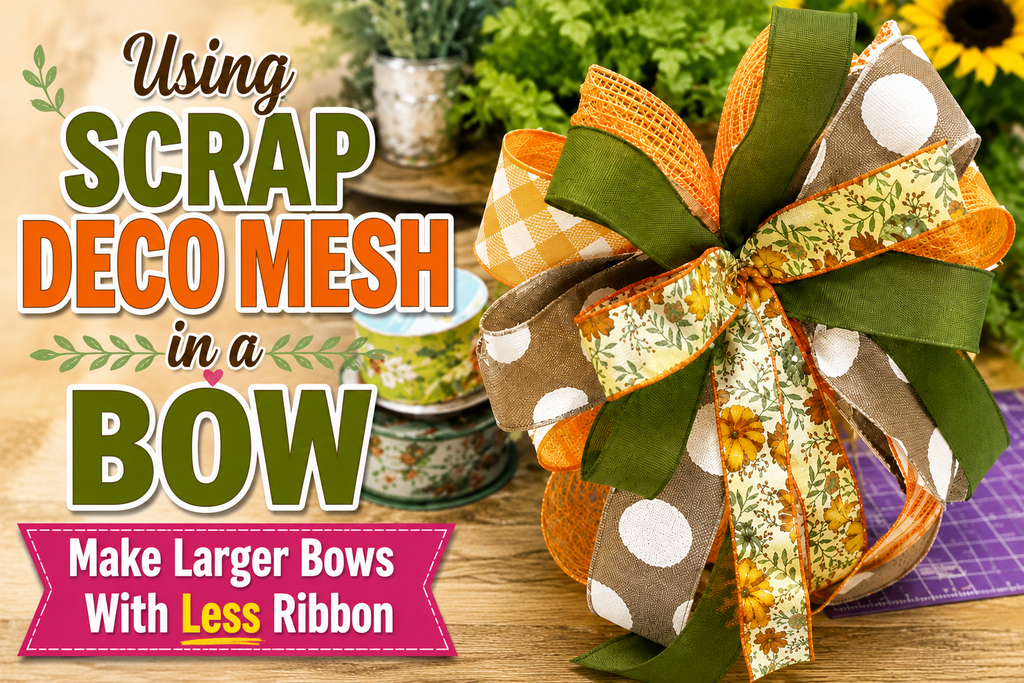
For example, if your focal ribbon contains moss green, orange, cream, and brown, use inexpensive solid ribbons in those same colors throughout the bow.
The solid ribbons help connect all the different designs together without making the bow feel overly busy.
Step 5: Save Your Expensive Ribbon for the Top
This is one of my favorite cost-saving tricks.
Your seasonal patterned ribbon or specialty ribbon is usually going to be the most expensive ribbon in your bow.
Instead of using expensive patterned ribbon throughout every layer, use more economical solid ribbons and small-pattern ribbons toward the bottom and middle of the bow.
Then place your beautiful focal ribbon near the top.
Because the focal ribbon is more visible there, you can use less of it and still make it look like the star of the bow.
You get the same gorgeous designer look while reducing the overall cost.
Step 6: Secure the Bow
Once all your ribbon and mesh layers are in place, carefully secure everything with your zip tie.
As you tighten the zip tie, remember that ribbon may shift slightly. Keep your hand on the bow and hold the layers in position while gradually tightening.
Don’t immediately pull the zip tie as tight as possible. Secure it enough to hold everything together, then adjust your ribbons before giving it the final tightening.
Step 7: Fluff Using the Twist-and-Pull Method
Now comes the fun part: fluffing!
Start separating your individual loops.
If a ribbon loop feels stuck or folded underneath another layer, use the twist-and-pull method.
Twist the ribbon slightly and gently pull it outward from the center.
Sometimes ribbon becomes trapped inside the tight center of the bow. Breaking the ribbon free from that center point makes it much easier to position.
Continue twisting, pulling, and arranging each loop until the bow looks balanced.
In this type of bow, you may only have around six loops on each side, but because of the scrap deco mesh and strategically layered ribbon, the finished bow can look much larger.
A Bigger Bow Without a Bigger Budget
This technique is a great example of how good bow making isn’t always about using more supplies.
Sometimes it’s simply about knowing where to place them.
Scrap deco mesh adds volume, inexpensive solids create structure, and your beautiful focal ribbon provides the finishing touch.
Before throwing away those leftover pieces of deco mesh from your next wreath project, save them! That little scrap may be exactly what you need to turn an ordinary bow into a large, full, professional-looking bow without adding much extra cost.