

Pawsitively Merry Christmas! Santa Paws Deco Mesh Wreath | Easy Poofs, Woodland Ruffles, and a Matching Sign and Ribbon Set
Pawsitively Merry Christmas! Santa Paws Deco Mesh Wreath | Easy Poofs, Woodland Ruffles, and a Matching Sign and Ribbon Set
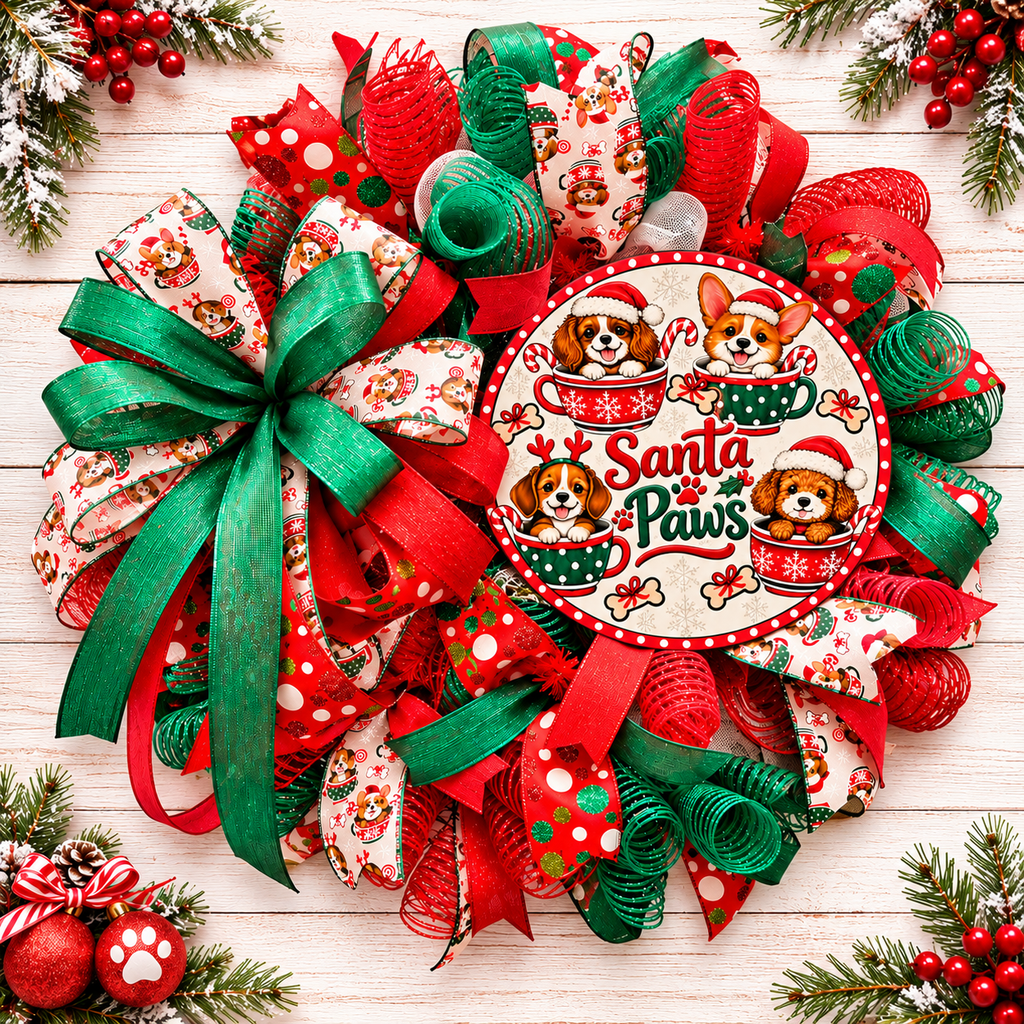
If you love Christmas, adorable puppies, and beautiful handmade wreaths, you’re going to fall in love with this Santa Paws Christmas Deco Mesh Wreath! With traditional red and green, bright white deco mesh, and the cutest little puppies sitting in Christmas mugs, this wreath is absolutely pawsitively adorable!
What makes this design special is the combination of easy deco mesh poofs and woodland ruffles. The white poofs brighten the entire wreath, while the red and green ruffles add fullness and dimension.
We’re also using a coordinating Santa Paws Sign and Ribbon Set, which makes matching your ribbons to your sign so much easier. And I’ll show you how to create a beautiful layered bow that completes this festive Christmas design.
Let’s get crafting, y’all!
Supply List
- Red work wreath frame with ties
- White deco mesh for the poof base
- Red deco mesh, cut into nine 30-inch pieces
- Green deco mesh, cut into nine 30-inch pieces
- Santa Paws metal wreath sign
- Santa Paws Sign and Ribbon Set
- Red ribbon with red, green, and white polka dots
- Vibrant emerald green wired ribbon
- Christmas ribbon featuring puppies in holiday mugs
- Red wired ribbon with glitter accents
- Coordinating Santa Paws Sign and Ribbon Set
- Zip ties
- Pipe cleaner
- 26-gauge silver wire
- Plastic weaving needle
- Metal hole punch
- Bow maker
- Scissors or rotary cutter
- Wire cutters
Step-by-Step Instructions
Step 1: Prepare Your Wreath Frame
Start with a red work wreath frame.
Push the upper ties toward the center while you work on the bottom row. This helps keep everything organized and prevents accidentally attaching mesh to the wrong ties.
For this design, we’re using white mesh as our foundation because it coordinates with the white background of the Santa Paws sign.
The white will also help brighten the traditional red and green colors.
Step 2: Create Your White Deco Mesh Poofs
Gather the beginning of your white deco mesh and secure it to the bottom wreath frame using a zip tie.
I like starting with a zip tie because it allows me to hide the attachment point when I come back around with the mesh.
Tuck the rough edges underneath and gather the mesh loosely in your hands.
To create consistent poofs, stretch the mesh past the first tie to the second tie, then bring it back to the first tie.
This creates approximately an 8–10-inch poof without needing to measure every section.
Secure the mesh into the wreath tie and continue around the bottom row.
Step 3: Add White Poofs to the Top Row
Once you’ve completed the bottom row, open the upper ties and repeat the same poof technique.
Secure the beginning with another zip tie and continue around the top row.
Don’t worry if the white mesh looks slightly transparent. We’re going to cover much of it with beautiful red and green woodland ruffles.
When finished, secure the remaining mesh with a zip tie and trim any excess.
Step 4: Make Your Woodland Ruffles
Take one 30-inch piece of red or green deco mesh.
Roll one end inward approximately three complete turns. Repeat with three turns on the opposite end.
Gather the remaining mesh straight through the center, creating a woodland ruffle with beautiful curls on both sides.
The longer 30-inch mesh pieces allow you to create generous curls while still leaving plenty of material for the ruffled center.
This gives the wreath a wonderfully full appearance.
Step 5: Add Woodland Ruffles and Ribbon Tails
Begin adding your woodland ruffles to the bottom row, alternating between red and green.
Fold your coordinating ribbon tails in half, pinch the centers, and gently curve the wired edges.
Place the ribbon tails on top of your woodland ruffle and secure everything into the wreath tie.
Alternate your ribbon combinations throughout the wreath:
- Polka dot ribbon with vibrant green
- Puppy Christmas mug ribbon with glittery red
Spread the curls outward so the red and green colors remain visible against the white foundation.
Step 6: Complete the Top Row
Continue adding woodland ruffles and ribbons around the top row.
Because there is more room to spread your ribbons on the top, make sure those adorable puppy patterns remain visible.
Fluff each ruffle and pull the ribbons apart to create a beautiful, full appearance.
You’ll notice how the white poofs peek through the red and green mesh, adding brightness and preventing the wreath from looking too dark.
Step 7: Make Your Coordinating Christmas Bow
Using the same ribbons, create a beautiful layered bow.
Start with approximately 10-inch tails and 6-inch loops.
Layer your ribbons, making two loops with each ribbon design. Go down half an inch with each additional ribbon.
When working with the puppy ribbon, you may notice some puppies appear upside down.
Simply create the loop, lift the entire loop, and flip it over so the pattern faces the correct direction.
Secure your bow with a zip tie, adding a pipe cleaner to the back before tightening completely.
Step 8: Fluff and Attach Your Bow
Separate the bow loops and gently twist them back and forth to release any ribbon trapped near the zip tie.
This helps the loops stand up beautifully.
Run your hands underneath the ribbon tails to give them a gentle curve.
Attach your bow securely to one side of the wreath using the pipe cleaner, wrapping it around the actual frame.
Fluff the bow again after attaching it.
Step 9: Attach Your Santa Paws Sign
Using a metal hole punch, create one hole at the top and one at the bottom of your Santa Paws sign.
Cut approximately 20 inches of 26-gauge silver wire for each attachment point.
Thread the wire through the holes, double it, and twist it securely.
Use a plastic weaving needle to guide the wire through the mesh and around the wreath frame.
For this design, position the sign slightly off-center, balancing it with the coordinating bow.
Secure the wire around the frame, then adjust the sign until it sits beautifully among the ruffles.
Step 10: Add the Finishing Touches
Take one final look at your wreath.
Spread the ribbons so the puppy designs are visible, fluff the woodland ruffles, and adjust the white poofs.
Make sure your sign and bow balance each other without covering too many of the beautiful ribbon patterns.
Your adorable Santa Paws Christmas Wreath is now ready to display!
Want to Make Your Own Santa Paws Christmas Wreath?
Isn’t this wreath absolutely adorable? I love how the bright white poofs make the traditional red and green colors pop, while the sweet little puppies give it so much personality!
Would you love to make this Santa Paws Wreath for your own front door or as a special Christmas gift for a dog lover?
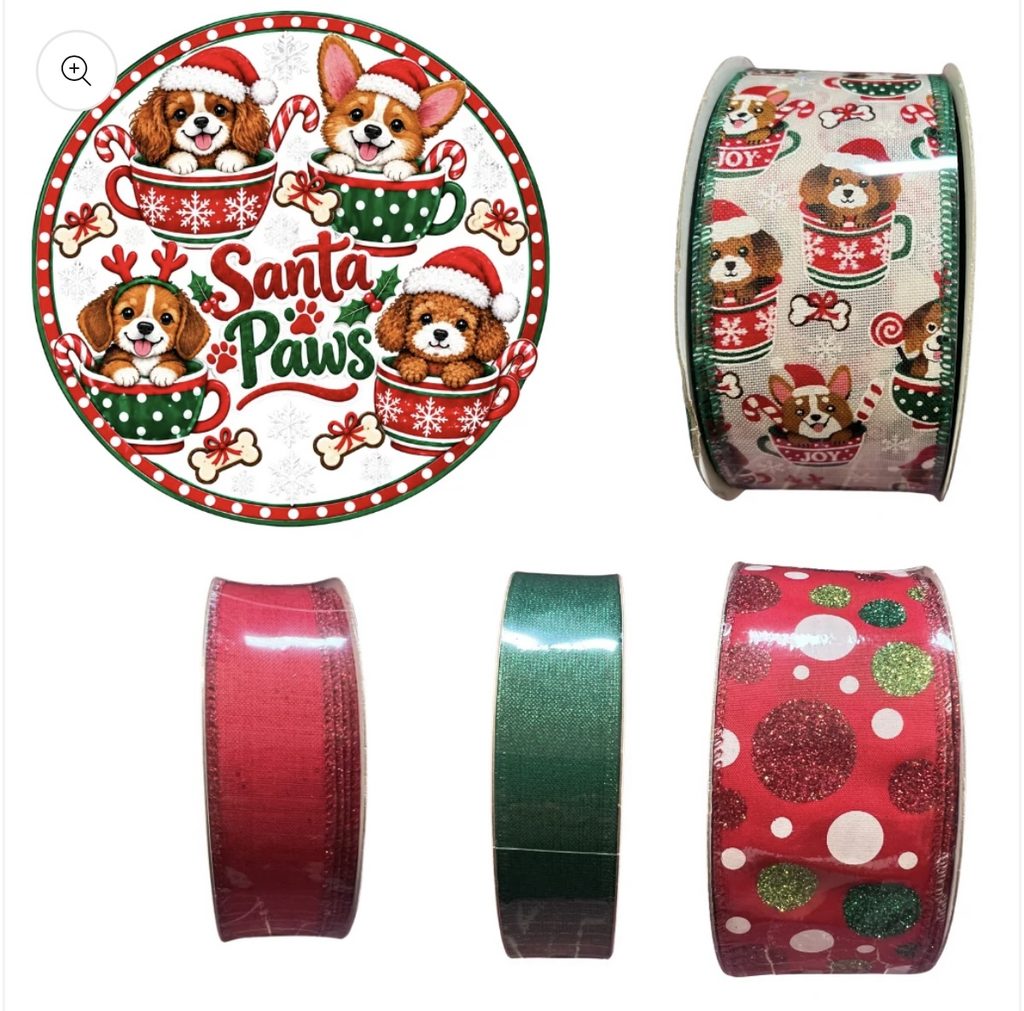
I’ve made finding the perfect coordinating supplies so much easier with my Santa Paws Sign and Ribbon Set from RCL Signs and More!
Instead of purchasing several separate rolls of ribbon and trying to find colors and patterns that coordinate, I’ve already done the work for you!
For just $20, you’ll receive a beautiful 10-inch Santa Paws sign and 20 yards of coordinating, premium-quality wired ribbon.
I use the highest-quality ribbon because it holds its shape beautifully, fluffs easily, and helps give your wreaths that full, professional appearance.
Plus, you’ll receive FREE SHIPPING on orders of $50 or more!
Visit rclsignsandmore.com to shop for your Santa Paws Sign and Ribbon Set.
Now tell me, y’all — would you make this adorable wreath for yourself, or would you give it to a special dog lover for Christmas? I’d love to hear your ideas!