

Easy and Festive Traditional Harvest Deco Mesh Wreath for Your Front Door
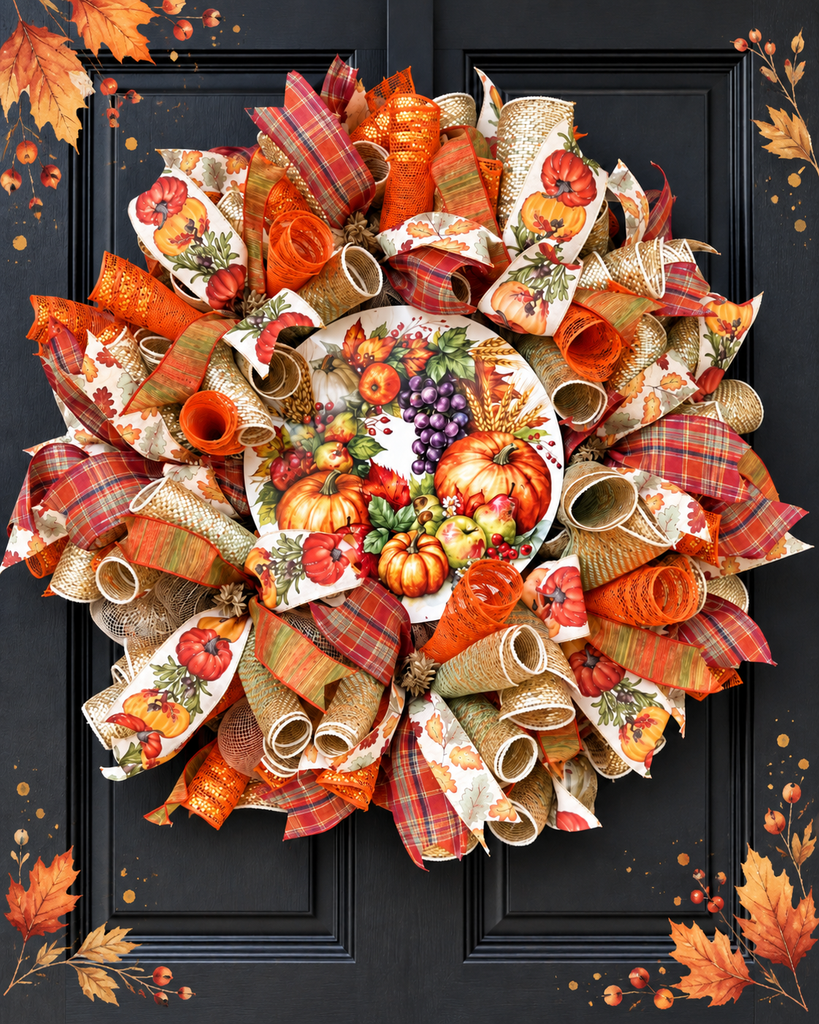
Easy and Festive Traditional Harvest Deco Mesh Wreath for Your Front Door
If you love traditional fall colors and want a full, festive wreath for your front door, this Traditional Harvest Deco Mesh Wreath is a beautiful project to make. It has all the cozy autumn details: a harvest sign, gold mesh, green and gold ombre mesh, orange metallic accents, pumpkin ribbon, plaid ribbon, and leafy fall ribbon. The finished wreath is full, colorful, and perfect for welcoming guests all season long.
This design starts with a simple deco mesh base using 10-inch mesh and poofs, then adds curls, ribbon tails, a metal sign, and a handmade bow. The base mesh does not have to be expensive because it mainly works as a foundation to help push everything up and make the wreath look nice and full. I used a gold mesh from Sam’s for the poof base, then added ombre green and gold mesh with orange metallic mesh to bring in the colors from the sign.
Supply List
Work wreath frame with ties
10-inch gold mesh for poof base
10-inch green and gold ombre mesh
10-inch orange metallic stripe mesh
Harvest metal sign
Pumpkin ribbon
Fall plaid ribbon
Leaf ribbon
26-gauge wire
Pipe cleaner
Zip ties
Weaving needle
Metal hole punch
Bow maker
Scissors or rotary cutter
Wire cutters
Step-by-Step Instructions
1. Prepare the Wreath Frame
Start by opening up all the ties on your work wreath frame. This makes it much easier to add the mesh without fighting the ties as you go. Pull the bottom ties down slightly and open the top ties so you can clearly see which row you are working on.
You will be working around the bottom row first, then moving to the top row.
2. Start the Mesh Base
Take your 10-inch gold mesh and gather the end together. I like to use a zip tie to secure the beginning instead of starting directly in the first tie. Place the zip tie right before the first tie on the frame. This lets you skip that tie at the beginning and come back to it at the end, which helps hide where the mesh starts and stops.
Trim off the extra zip tie and tuck any rough mesh edges under.
3. Make the Bottom Row of Poofs
To make each poof, gather the mesh in your hands in a “C” shape and tuck the rough edges under. Measure from one tie to the third tie, then pull it back slightly to create about a 10-inch poof. I use the “first tie, third tie, back to first tie” method to keep my poofs consistent.
Continue around the bottom row of the wreath frame, securing the mesh into each tie. When you get back to the beginning, use the tie you skipped so the starting point is covered and hidden.
4. Add Poofs to the Top Row
Once the bottom row is finished, move to the top row. Use the same method, creating 10-inch poofs all the way around. I tie my mesh down because it keeps the poofs from sticking up too much and gives the wreath a cleaner look.
When you finish the top row, cut the mesh, flip the wreath over, and secure the loose end to the frame so it does not pop up later.
At this point, the wreath base will be covered, but you may still see through some of the mesh. That is okay because the curls and ribbon will fill everything in.
5. Prepare the Mesh Curls
For each tie, use two pieces of green and gold ombre mesh and one piece of orange metallic stripe mesh. Cut the mesh pieces at 10 inches.
Roll each piece into a curl. Place the three curls together, then add them into each tie. The green and gold mesh brings in the wheat and harvest tones from the sign, while the orange adds a warm traditional fall color.
I chose to use two ombre pieces and one orange piece because the ribbon already had a lot of orange, and I wanted more green and gold in the wreath.
6. Add Ribbon Tails
Cut your ribbon tails at 12 inches. For this wreath, use a mix of pumpkin ribbon, fall plaid ribbon, and leafy ribbon.
Fold each ribbon tail in half, pinch it in the center, and run your hands under the ends to shape it. Place the ribbon tail on top of the mesh curls and secure it into the tie.
Continue this process around the entire wreath. On the top row, spread the ribbons out a little more because there is more room. Once the curls and ribbons are added, the wreath will become full and colorful.
7. Attach the Harvest Sign
Use a metal hole punch to punch holes in the sign. I use a metal sign because it is treated, will not rust or fade in the sun, and the sublimation ink fuses with the metal, making it much more durable than wood signs outdoors.
Cut a piece of 26-gauge wire about 20 inches long. Thread the wire through the hole, bring the ends together, and twist them so the wire does not move. This doubles the wire and helps keep the sign secure.
Use a weaving needle to pull the wire down through the mesh, then tie it around the frame. Repeat on the other side of the sign until it is firmly attached.
8. Make the Bow
Choose your ribbons for the bow. Start with the ribbon you want on the bottom layer. Dovetail the end by folding the ribbon in half and cutting at an angle toward the wired edge.
Measure about a 10-inch tail and place the ribbon in the bow maker. Make 6-inch loops, twisting the ribbon in the center each time you cross over. Add additional ribbon layers, using coordinating fall ribbons.
If you accidentally cut too many mesh pieces, you can add them into the bow as extra tails. This adds fullness and makes the bow look like it has more loops. I use this trick in the bow to make it fuller and hide that fewer loops were made with one ribbon.
9. Secure and Fluff the Bow
Slide a zip tie under the bow and get it started, but do not tighten it completely. Add a pipe cleaner under the zip tie, then pull everything tight.
Fluff the bow by placing your hand inside each loop and twisting it gently back and forth. This helps spread the ribbon and pull out any pieces that are stuck in the center. Curl the tails loosely around your thumb so they look soft and full.
10. Add the Bow to the Wreath
Decide where you want your bow. You can place it at the bottom, on the side, or at the top. For this design, the bow looks beautiful near the bottom because it balances the sign and gives the wreath a finished look.
Attach the bow securely to the wreath frame using the pipe cleaner. Fluff the loops again and arrange the tails around the mesh and ribbon.
This Easy and Festive Traditional Harvest Deco Mesh Wreath is perfect for your front door, porch, or even a mailbox if you love coordinated fall decor. With a simple mesh base, full curls, pretty ribbons, a harvest sign, and a handmade bow, you can create a beautiful wreath that celebrates the cozy colors of autumn.