
How to Make a Halloween Deco Mesh Sunburst Wreath
How to Make a Halloween Deco Mesh Sunburst Wreath
Hey everyone! Lori here from Hard Working Mom, and today we’re diving into a fun Halloween craft: a Deco Mesh Sunburst Wreath. This is one of my favorite styles to make because it’s full, colorful, and gives that festive burst look that makes any door stand out. If you’ve been crafting along with me for a while, you know I love projects that use Dollar Tree or craft store basics to create something magical. Let’s get started!
Supplies You’ll Need
Here’s everything you’ll want to gather before starting your Halloween wreath:
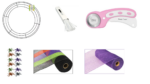
- (1) 14-inch flat wire wreath frame (you can find these at Dollar Tree, Walmart, or Hobby Lobby)
- Deco mesh rolls – four colors: orange, black, green, and purple (each cut into 10″ x 10″ squares)
- Metallic deco mesh tubing – in Halloween colors (orange, black, purple, and green)
- Pipe cleaners (black or matching color)
- Halloween ribbons – at least 4 different styles, 2.5″ width preferred
- Rotary cutter and Fiskars self-healing cutting mat
- Scissors
- Ruler or 6-inch cardboard template (for measuring ribbon)
- Floral wire (for attaching decorations)
- Hot glue gun or E6000 spray adhesive
- Halloween embellishments – skeletons, bats, glitter picks, etc.
- Round placemat or felt sheet (to cover the back)
- Optional: clip or chip clip (to help hold bundles if you have hand pain)
Step 1: Prepare and Cut Your Mesh
Start by rolling out your four colors of metallic deco mesh: orange, black, green, and purple. Each roll should be cut into 10” x 10” squares. Stack the mesh layers together to make cutting faster and more uniform.
💡 Pro Tip: Always start with a clean edge for accurate measurements. Use a rotary cutter on a self-healing mat to speed things up and keep your cuts straight.
You’ll need 24–36 mesh squares total, depending on how full you want your wreath to look. Each square becomes part of a bundle, so the more you make, the fluffier your wreath!
Step 2: Cut Your Ribbons
For each bundle, you’ll use two ribbon strips. Cut your ribbon at either 12” or 14” depending on how much you want the ribbon tails to stand out.
Use a 6-inch cardboard template wrapped in duct tape to make the process faster. Wrap the ribbon around the template several times, then cut across the top edge: now you have uniform pieces!
Fold each ribbon in half and cut at an angle from the center fold to the corner to create beautiful dovetail ends.
Step 3: Build Your Bundles
The secret to the sunburst effect is in the bundle technique. Here’s how to make them:
- Take one 10×10 mesh square and pull gently at opposite corners.
- Tuck the two corners toward the center and pinch in the middle: this forms a starburst “petal.”
- Repeat this with three more mesh colors so you have four “petals” in hand.
- Hold them together and place two ribbon pieces on top.
- Secure with a pipe cleaner, twisting tightly in the center.
You now have one colorful, full bundle ready to go!
Optional: Add a loop of deco mesh tubing (around 30 inches long, looped like a bow) into some of your bundles for extra sparkle and texture.
Step 4: Attach Bundles to the Wreath Frame
Take your 14-inch wire wreath frame and begin attaching your bundles between rings two and three. Use the pipe cleaners to secure each bundle tightly to the frame.
Start with about six bundles in the first section to fill it completely. As you move around the wreath, you’ll likely need fewer bundles (around four per section) because the wreath gets fuller as you go.
Keep alternating your colors and ribbon patterns for a balanced look. Fluff and adjust the mesh so there are no gaps and you can’t see the wire frame.
Step 5: Add Halloween Decorations
Once your wreath base is full, it’s time to add your spooky accents!
Use floral wire to attach decorations securely. Some fun options include:
- A skeleton centerpiece sitting in the middle
- Small metal bats or spiders wired onto the mesh
- Glittery picks for extra shine
You can also tuck in pieces of tubing or ribbon tails to fill any bare spots. The key is to keep it playful and textured.
Step 6: Secure and Finish the Back
To give your wreath a professional finish, turn it over and check the back. Push all the pipe cleaner ends down or trim them neatly.
Cut a round placemat or felt circle to fit the back and wire or glue it in place. This hides your pipe cleaners and keeps the wreath from scratching your door.
Add a pipe cleaner loop or ribbon at the top as your hanger, securing it with glue so it won’t slip.
Step 7: Final Touches
Before hanging your wreath, spray lightly with E6000 adhesive spray to help seal any frays. Gently trim any loose strands of mesh, fluff your ribbons one last time, and adjust your decorations.
Now step back and admire your work: you’ve created a vibrant Halloween Deco Mesh Sunburst Wreath that’s bursting with festive energy! Whether you hang it on your front door or use it indoors as wall décor, it’s sure to bring smiles (and maybe a few spooks!).
Ideas to Customize Your Wreath
- Holiday Swap: Change the colors and ribbons for Christmas, Easter, or even a beach theme.
- Centerpiece Option: Use the same method on a smaller frame to make a matching table centerpiece.
- Add Lights: Battery-powered fairy lights tucked between the mesh layers can make it glow at night.
