
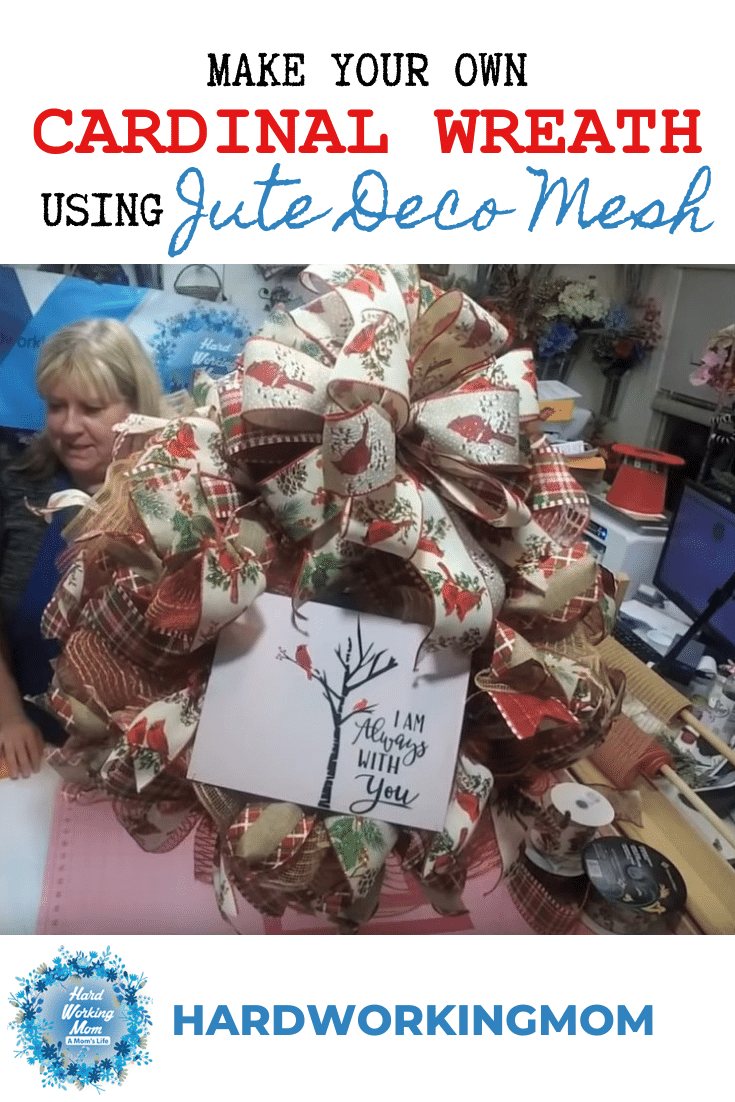
How to Make a Cardinal Wreath Using Jute Deco Mesh
Disclaimer: this post contains affiliate links for supplies and tools used. If you purchase, I will get a few pennies for the purchase. About enough to buy a stick of gum 🙂
Learn how to make a wreath with 30-inch jute deco mesh and a cardinal sign. Easy, step-by-step video tutorial and written instructions with helpful links and video timestamps.
The natural colors in this wreath could be used for Fall and Winter, and maybe even Spring.
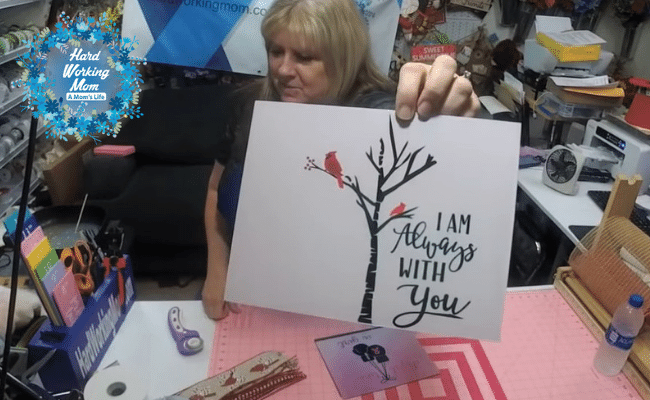
Here is the sign I’ll be using for the cardinal wreath:
Method: Ruffles
Ribbons: cut at 12 inches
Mesh: cut at 30 inches
Supplies are as follows:
- 15” Red Work Wreath, https://goo.gl/QPsTPY
- Cardinal Sign, https://hardworkingmomstore.com
- 10” Jute Mesh in Natural, https://goo.gl/QPsTPY
- 10” Jute Mesh in Natural with Red, https://goo.gl/QPsTPY
- One Pipe Cleaner
- One Zip Tie
- Silver Wire
- Metal Hole Punch
- Scissors
Ribbons:
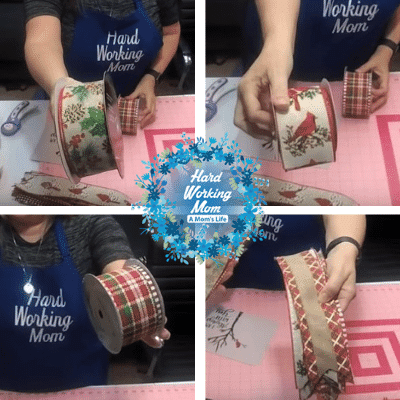
- 2.5″ Cardinal Ribbon, https://goo.gl/QPsTPY
- 2.5″ Holly and Pinecone Ribbon, Sam’s Club
- 2.5″ Red, White, and Green Striped Ribbon, Hobby Lobby
- 2.5″ Red, White, and Green with Natural Ribbon, Hobby Lobby
Tools:
- Mesh Roller https://www.simplify-organize.com/pro…
- Probow the hand https://amzn.to/2zbz4Yp
- Fiskars Rotary cutter and mat https://amzn.to/2hyAUHL
- Ryobi Glue gun https://amzn.to/2hBoizL
- Bowdabra bow maker https://amzn.to/2zdPxeE
- Metal Hole Punch https://amzn.to/2Ao
How to Make a Cardinal Wreath Using 30-Inch Jute Mesh Ruffles
Written Instructions with Video Timestamps:
Prepping the Jute Mesh
You’ll need to cut 18 total pieces at 30 inches in length:
Natural Mesh: 9 pieces
Natural with Red Mesh: 9 pieces
Prepping the Wreath Frame
For this wreath, I used a 15″ red work frame with thick ties. Open up the ties before starting.
Cutting Ribbons
Precut each of the ribbons at 12 inches. You’ll need a total of 9 pieces of ribbon for each of the 4 different ribbon styles. We’ll attach them to the wreath in an alternating pattern. Dovetail the ends of the ribbon (make a v-cut).
Below is an image of the ribbons that I use in this project:
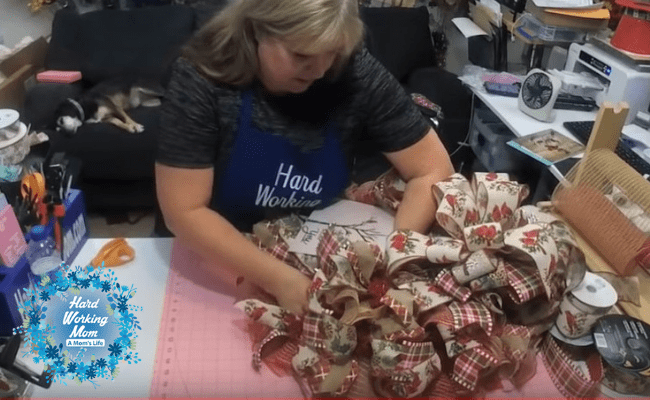
Making and Attaching the Ruffles
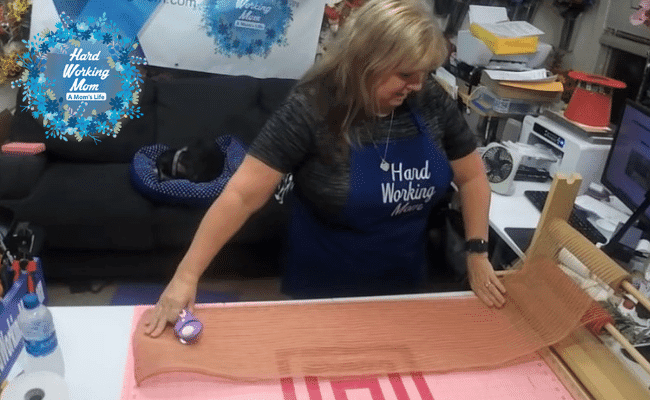
Start with a 30 inch piece of natural mesh. Lay it on your table. Starting on one end, using both hands, ruffle the mesh together until you reach the other end. It’ll feel like you’re scrunching it up like an accordion [4:39].
Tie the ruffle onto the wreath frame, starting on the outside of the frame. Twist the tie around the center of the ruffle. It should look like a bow.
Next, take a 30 inch piece of natural red mesh, ruffle it up, and attach it to the next tie beside the first ruffle.
Repeat, alternating mesh colors, around the outside of the wreath frame. You will have 10 ruffles total around the outside of the frame (5 natural, 5 natural with red).
Then you will work the inside of the frame, again alternating ruffle colors. You should have a total of 8 inside ruffles (4 natural, 4 natural with red).
Tying on the Ribbons
Stack your first two ribbons together and pinch in the center to create a bow [20:14]. Make sure your ribbons are different. Slope down the ribbon tails with your fingers. Tie onto the wreath starting on the outside of the frame.
Take your next two ribbons, stack, pinch, slope down, and tie onto the wreath next to the first set of ribbons. Again, make sure your ribbons are different.
Repeat the above steps, working your way around the wreath, alternating ribbons. If you’d like a glimpse of how the wreath looks at this point, view the video at timestamp [30:00].
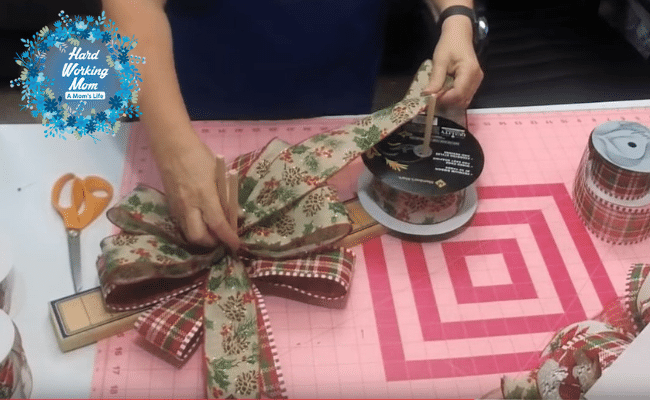
Making the Bow Topper
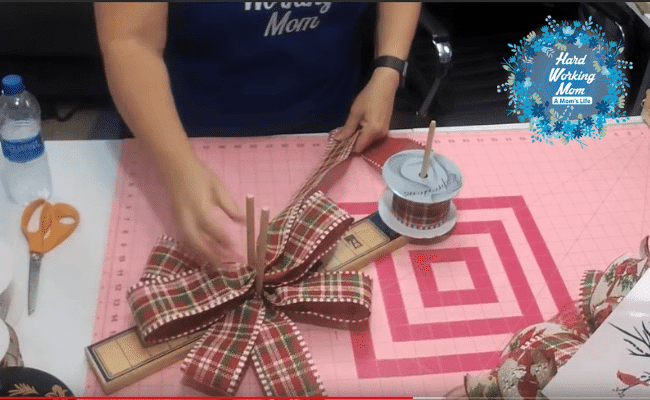
Next, we’ll create a bow topper using the Easy Bow Maker [33:30]. Make your bow loops 6”. Because this is one-sided ribbon (Red, White, and Green Striped Ribbon), we’ll have to twist it at the center each time we create a new loop. If you have trouble making bows, I highly recommend the Easy Bow Maker!
Using the Bow Maker, create 3 bow loops on each side of the bow. On the last loop, you do not need to twist it. Dovetail your ribbon ends.
Repeat a new bow directly on top of the first if you’re using the Easy Bow Maker. Using the Holly and Pinecone ribbon, create a bow with only two loops on each side.
Using the cardinal ribbon with snow, I’ll show you how to make the next bow by hand [37:32]. Again, make a bow using two loops on each side, dovetail the ends. Stack on top of the first two bows.
Repeat the next bow using the plain cardinal ribbon making two loops on each side. Place on top of the bow stack. Now we have a nice, thick bow using 4 different ribbons!
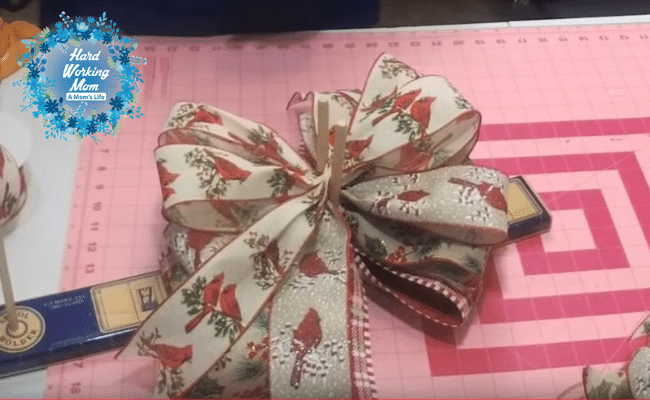
Using a zip tie, wrap it around the center of the bow stack and loosely secure. Remove bow stack from Easy Bow Maker. Make sure your ribbons are aligned and tighten your zip tie a little tighter. Do not over tighten.
Fluff your bow by stretching everything out and spreading your loops. Run a pipe cleaner under the zip tie, and then pull the zip tie as tight as you can make it. Trim the excess zip tie. Twist the pipe cleaner in place. Fluff up the bow [42:54].
Decide where to place the bow topper. Here’s a trick. If you do not want your bow to be high, place it over a wreath tie. If you want your bow to be high, place it over the mesh.
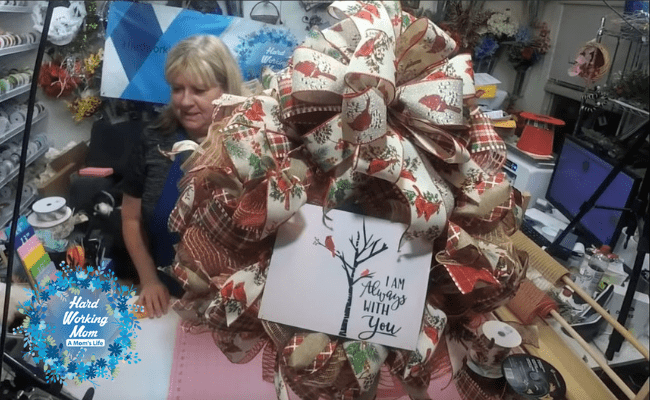
Attaching a Sign to the Wreath
Punch holes into the four corners of your metal sign. Use silver wire as ties for each corner on your metal frame. Measuring isn’t necessary, but you want a long enough wire to reach through the fluffy mesh and tie onto the frame, you can always snip the excess tie once finished.
For this wreath, tie the sign to the base of the wreath. Slip the left two wires around the base of the wreath and tie together in the back. Repeat for the right side.
Completed Wreath
May this wreath remind you of your loved ones and those special moments together. I hope you enjoyed this Cardinal Wreath tutorial using jute mesh!
Save it for later on Pinterest:
For more Fall Project Ideas and Tutorials, check out my YouTube Playlist: Fall Wreaths and Crafts
For more Winter Project Ideas and Tutorials, check out my YouTube Playlist: Learn How To Make Christmas and Winter Wreaths, Swags, and Centerpieces
If you love making wreaths, you can purchase my wreath kits and supplies at HardWorkingMomStore.com.
I hope this post inspires you to get crafty! Share with me! I’d love to hear from you. My social links are posted below.
Thank you,
❤ Lori
Other Posts You May Like:

Need Help?
If you are interested in learning more about our Success Path group, you are welcome to do so following this link: https://hardworkingmom.com/success-path
Want to learn Wreath Designing? Here is my Coaching Group, follow the link here: https://hardworkingmom.com/product/design-with-hard-working-mom-wreath-therapy-on-steroids/
Need a bundle, here is the link to save on both groups: https://hardworkingmom.com/product/design-with-hard-working-mom-wreath-therapy-on-steroids-combined-with-lori-jacobs-success-path/
Find Me Here
Hardworkingmom Store: https://hardworkingmomstore.com/
Amazon Influencer/My Favorite Supplies: https://www.amazon.com/shop/influencer-5ef69f14
Email me: [email protected]
YouTube: @https://www.youtube.com/hardworkingmom
Instagram: @hardworkinglori
Twitter: @hardworkingmomtv
Facebook: @hardworkingmomtv
My Etsy Shop: DesignedByHWM