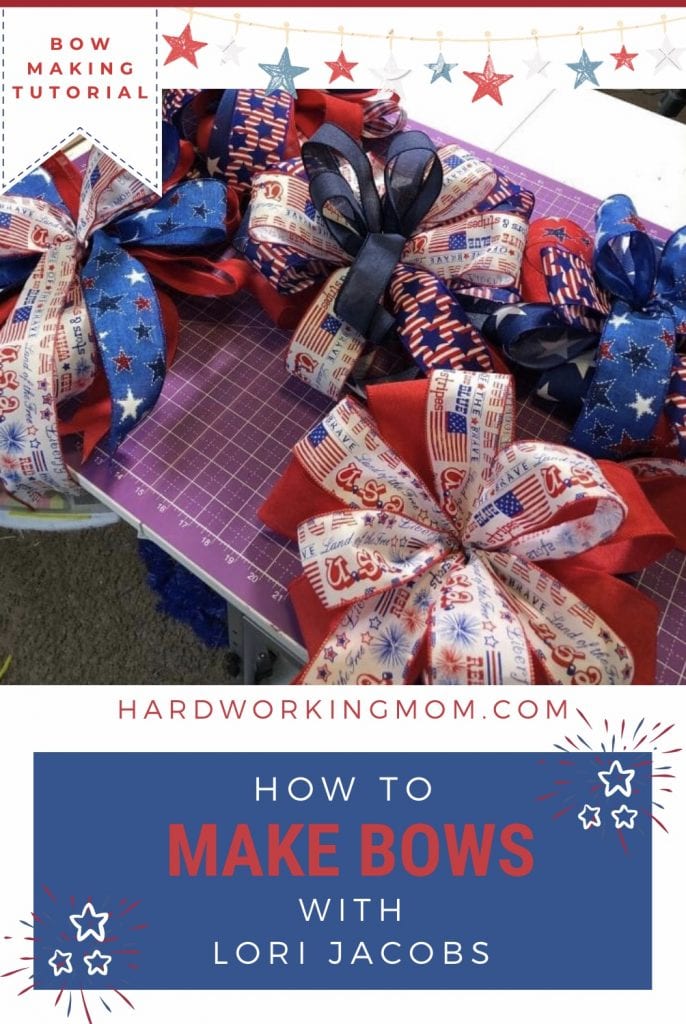
How To Make 5 Easy Bows
In today’s video, I will show you how to make 5 different styles of bows using some patriotic ribbon I happen to have on hand. I have been making bows for many years now, and I have found some easy tips and tricks that will help you become a great bow maker in no time!
This post may contain affiliate links for your convenience. Click here to read my full disclosure policy.
I am using some patriotic ribbons here, but your ribbon pattern selections can be whatever suits your own taste or choose one that coordinates with a current project. I also made a great video tutorial below that you can watch and follow along as we make our bows. Now go grab some ribbon and Let’s Get Started!
Steps for How To Make The Bows
Bow Number 1
Step 1: To make this bow we are going to use the 4 in 1 by Probow The Hand. First, measure a 9” inch ribbon tail pinching the middle to start your first loop and place it between the two tall dowels on the 4 in 1 and twist so that the pretty side faces up. Next, form the first loop by measuring out to the 7” inch mark on the board, slide it between the two dowels and twist. You will do the same for your next loop (measuring to the 7” inch mark on the other side to form our second loop) and twist making sure the pretty side of the ribbon loops and tails are facing up. Trim and move on to the next ribbon selection.
Step 2: Repeating Step 1 above as you alternate your ribbon selections using 7” inch loops forming 2 loops and 2 ribbon tails on either side of the board. With this bow I use a total of 4 different ribbons.
Step 3: Taking a zip tie, run it underneath one side of bow and slightly tighten the zip tie but not all the way. Lift the bow from the 4 in 1. Turn the zip tie so that the zip tie head is facing toward the back of the bow. Adjust your loops slightly. Now, insert a pipe cleaner between the back of the bow and the zip tie and tighten down. Continue to fluff the loops to your liking, running your hand thru the tails to curl them and trim your excess zip tie. Note: I’m using a 4″ inch ribbon selection to start my bow, but you can use a 2.5″ inch ribbon as well, the choice is yours. Bow 1 is done!
Designer Tip: This bow will be placed on a mailbox. I recommend using 7” inch bow loops which forms a larger bow and really fits nicely on a standard size mailbox.
Bow Number 2
Step 1: To make this bow we will use a Bowdabra. First, measure a 9” inch ribbon tail pinching it in the middle at the 9″ inch mark to start your first loop and place it in the middle of the Bowdabra between the slotted opening and slide it down. At this point you can go ahead and add a wire or zip tie before placing the ribbon tail on the bowmaker.
Step 2: Next, measure your ribbon out 6” inches to form your first loop, twist and again measure out a 6” inch loop to form the second loop, sliding your loops onto the bowmaker as you go. At this point, you can pull the loops up toward the top of the Bowdabra to gauge if both loops are equal in length.
Step 3: Repeating Steps 1 & 2 above continue on to form 3 – 6” inch ribbon loops of the first ribbon selection. To finish this bow, we will use our third ribbon selection which has a bold printed design, so we will need to form these loops by hand first.
Here is how we get our printed ribbons going in the same direction:
First: Create a 9” inch ribbon tail by pinching the ribbon together at the 9” inch mark. Slide the pinched section between your thumb and forefinger. You will fold your ribbon under to form your first 6” inch ribbon loop, do not twist. Slide the ribbon loop you just created into the thumb and forefinger and hold it.
Second: Take the other side of the ribbon (the ugly side and pull it over so that the pretty side shows and make a 6” inch ribbon loop, sliding this loop into the thumb and forefinger area, you do not overlap the two loops, so your not putting the loops on top of each other. Trim a 9″ inch ribbon tail now place this set of printed ribbon loops on top of the bow stack in the Bowdabra.
Step 4: To finish this bow, repeat the same finishing steps in Bow Number 1 above (Step 3, Bow Number 1).
Designer Tip: It helps when making your loops to give yourself plenty of ribbon length as you start creating your bow loops. I sometimes like to drop my ribbon over the table making it easier to work with as I move along forming the bow loops.
Bow Number 3:
Step 1: To make this bow we will use the EZ Bow Maker. We will start with a 2.5” inch ribbon and create a 10” inch ribbon tail pinching the ribbon at the 10” inch mark placing the pinched section in between the two larger dowels and twist.
Note: The key to making the Lisa Bow, is to use two loops on one side and one loop on the other side, and where the one loop is you will end up with two tails, then alternate each side of your ribbon placement with each new ribbon selection.
Step 2: Next, when you start your second set of 2.5″ inch ribbon loops, place the loop opposite from the first ribbon loop placement. So where the single loop and two tails you just created, you form two loops on top of the “first single loop” ribbon and have two tails on the opposite side (on top of the original two bow loops).
Step 3: Now, for the first two ribbons we did two sets of 7” inch loops, so for our third ribbon pattern we will graduate down to a 6” inch loop. Again, your moving your two loops to the opposite side as you move along.
Step 4: For third 2.5″ inch ribbon selection, we use another bold printed pattern, this one will be done by hand and added to the ribbon stack. See Bow Number 2 above for the step by step instructions on how to make your printed ribbons flow in the same direction. Just remember “not to twist” the ribbon with this technique. You will add this set of ribbon loops on top of the stack on the bowmaker.
Step 5: Finally, with our last ribbon selection I will use a 1.5” inch ribbon and continue using the Lisa Bow technique remembering to move in the opposite direction to finish off ribbons on place it on the bow stack. As we do every time, to complete the bow, take a zip tie, sliding it under one side of the ribbon stack, slightly tighten, and lift the ribbon stack off the bowmaker. Move the zip tie head to the back of the bow and begin to fluff and adjust your loops and curling your ribbon tails and trim the excess part of the zip tie.
Designer Tip: Important to know about the EZ Bow Maker, the shorter dowel needs to be in place and aligned with the two taller dowels, all three dowels, located in the middle of the bowmaker, help keep each other in alignment and from falling and spreading out of the bowmaker while you work the ribbon creating your bows.
Bow Number 4:
Step 1: We will use our hands to make a hand tied “Double Bow”. First, give yourself plenty of ribbon to work with by pulling out a good amount of ribbon from each spool. Here you will place one ribbon on top of the other. Now using the “printed ribbon” technique in Bow Number 2 above, start forming your first 6” inch ribbon loop acting like both ribbons are one single ribbon. I’m using 2.5″ inch ribbon here.
Step 2: The trick to making this bow is keeping the ribbons together as you move along. You can easily do this with a bowmaker as well.
Step 3: Finish by holding the ribbon stack in middle while you place the zip tie around the stack and loosely tighten the zip tie moving the head of the zip to back of the bow stack. Now, you now have two choices; you can fluff the loops keeping both ribbons together or you can separate the two ribbons by pulling them away from each other. If you choose to separate them, you need to pull each ribbon in the opposite direction from each other. Finally, go around and pull one loop up and one down to round out the bow.
Designer Tip: I recommend using a fluff box when using this technique, it just makes it easier to help get your loops evenly spaced.
Bow Number 5:
Step 1: We will return to using the 4 in 1 Bowmaker and make a Teri Bow. Note: With the Teri Bow you will use 4 to 5 different ribbon patterns.
Step 2: Start with using a 2.5” inch wired ribbon creating your 9” inch ribbon tail pinching 9” inches from the end of your ribbon. Slide this the ribbon tail on to the bowmaker. Next, make 2 – 7” inch ribbon loops and 2 – 9” inch ribbon tails, trim off the ribbon spool and place it in the bow maker.
Step 3: Now, you will continue Step 2 above but will graduate down ½” inch with your next set of ribbon loops. At this point, you will adjust your loops so that the patterns are opposite of each other. Then continue graduating down and adjusting your loops and lengths as you move along until you have 4-5 ribbon loop stacked.
Step 4: Finally, you will take a zip tie and slide it under one side of the ribbon stack, slightly tighten the zip tie moving the head to the back of the bow stack, adjust your loops and curl you tails, then tighten the zip tie fully trim the excess and you are done!
Wow! You Have Just Made 5 Awesome Bows!!!
Designer Tip: The trick to making a Teri Bow on the 4 in 1 bowmaker, is to move down ½” inch with each new ribbon pattern.
You can shop for the supplies used to make these bows with two of my favorite online floral suppliers, Trendy Tree and Deco Exchange. I use these shops quite often and highly recommend them!
You May Also Need:
Designer Wreath Tools I Most Often Used in My Projects:
If you have enjoyed this and want to learn more about creating designer wreaths and more, join me in our Wreath Therapy Design Group.
And, if you’re ready to start and grow your own crafty entrepreneur business, join me in my Success Path Business Group.
You can always find me designing more wreaths like this one Live on YouTube at Hard Working Mom YouTube Channel.
If you’re new to wreath making and not sure where to find the tools and supplies you need to get started, You can easily find my Tools & Supplies Shop.
As always, I hope you enjoy today’s Wreath Therapy!
Lori