
How to Make a Lemon Jute Mesh Ruffle Wreath
Affiliate links for tools used. If you purchase I will get a few pennies for the purchase. About enough to buy a stick of gum 🙂
Happy Friday HWM Community & Happy Valentine’s Day. I am so stinking excited I hit my goal this week of 100,000 subscribers on YouTube and I cannot thank each one of you enough for subscribing and watching, so THANK you!
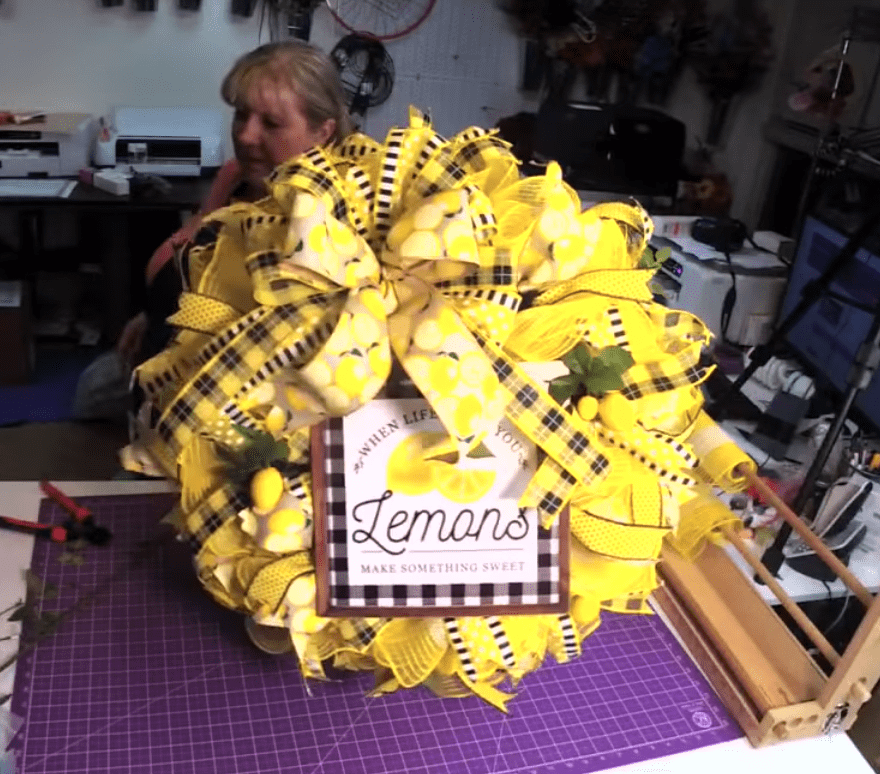
A couple of weeks ago we made this fun Lemon Jute Mesh Ruffle wreath. I have a supply list for you down below with links to most of these items. So let’s get started, I pre-cut all my materials for you so you know exactly how much you will need if you choose to make a wreath like this one here.
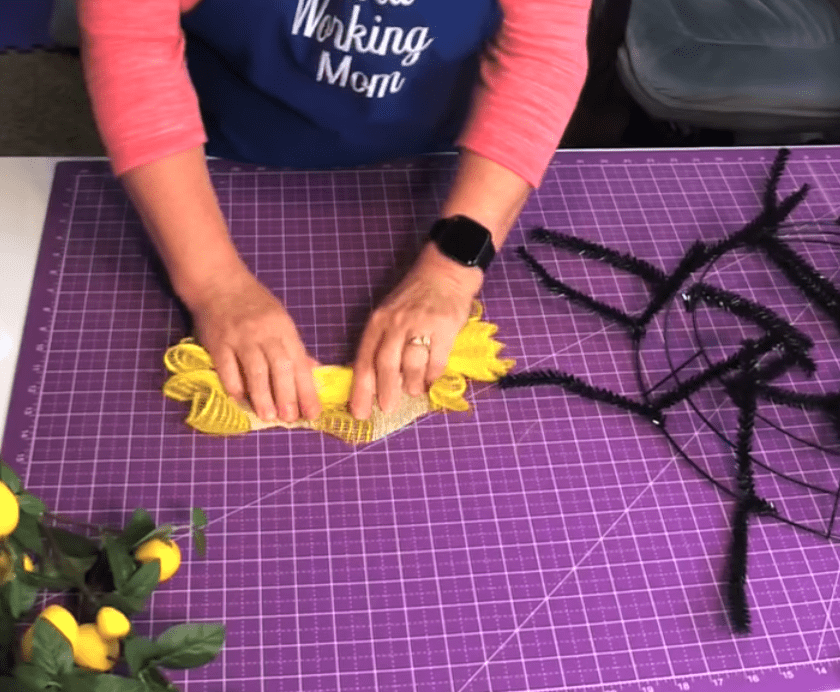
We are using a 15-inch work wreath frame, I cut my mesh at 30″ inches and you will need 2 rolls of 10in White and Yellow Jute mesh. Open all the ties around your frame. We are going to make a ruffle we will lay it flat place thumbs at the end and create a waterfall and push with your fingers and holding it with your thumb. It should look like a bow tie.
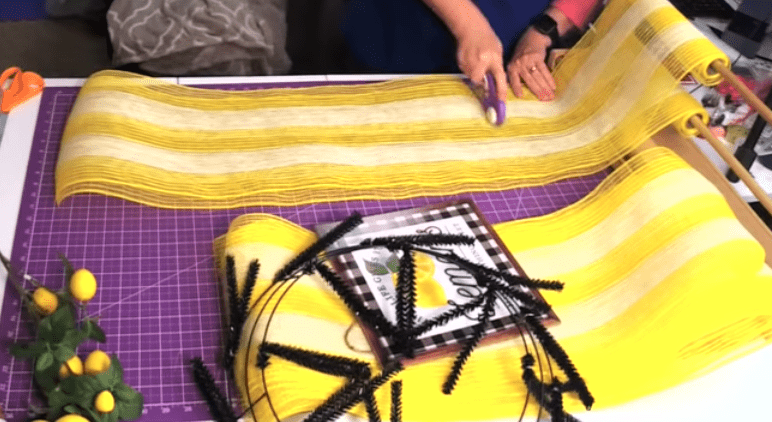
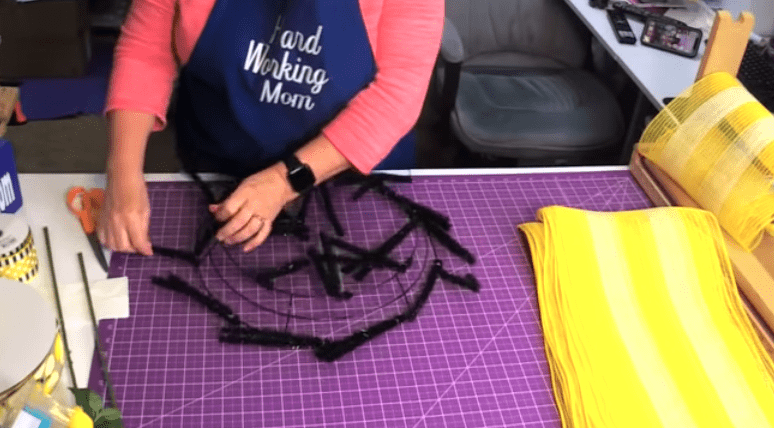

This mesh is thick so make sure if you are not using a work frame and using a dollar tree & pipe cleaner frame you tie it on a couple of extra times to secure it, it could pop it out if you don’t have it tight. We will continue to make these ruffles going all around the wreath. Using our fingers pushing and keeping the ruffle going straight into the center. Placing into the ties.
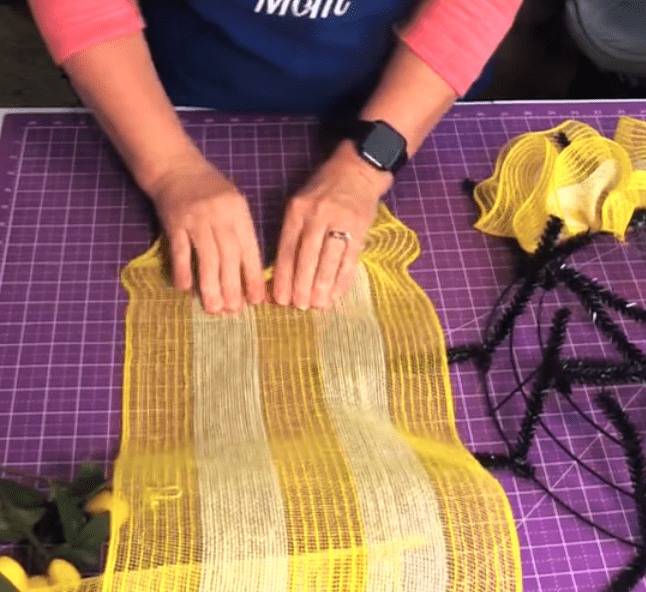
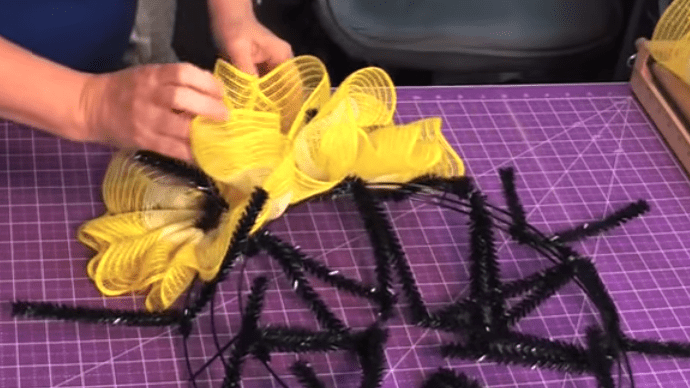
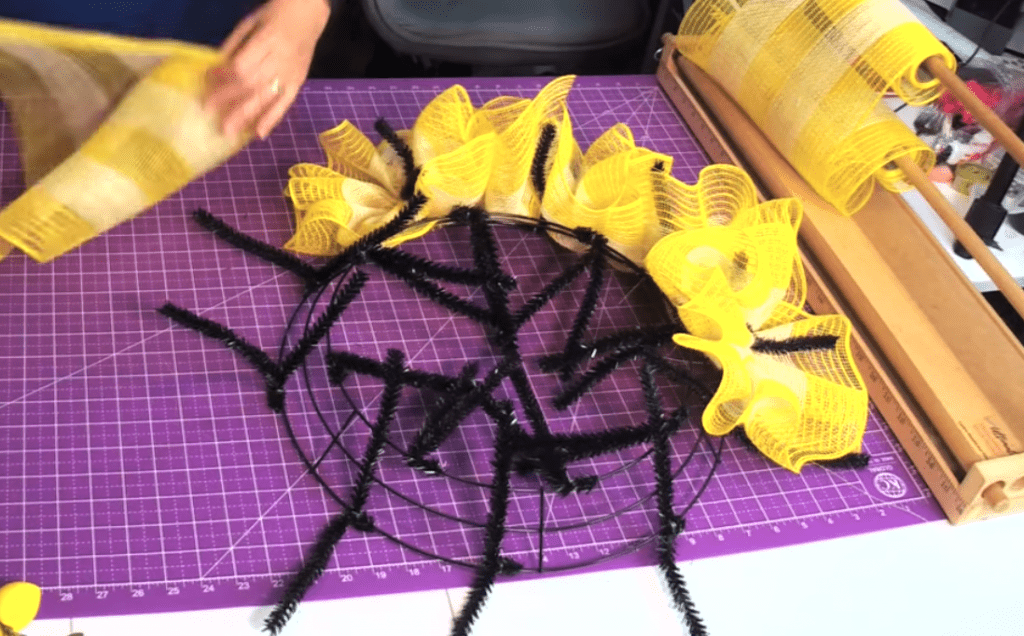
If you are having trouble keeping the mesh going straight you can place something heavy on the other end and make sure you are spreading your fingers out also helps. Look how full this wreath is, loving the yellow.
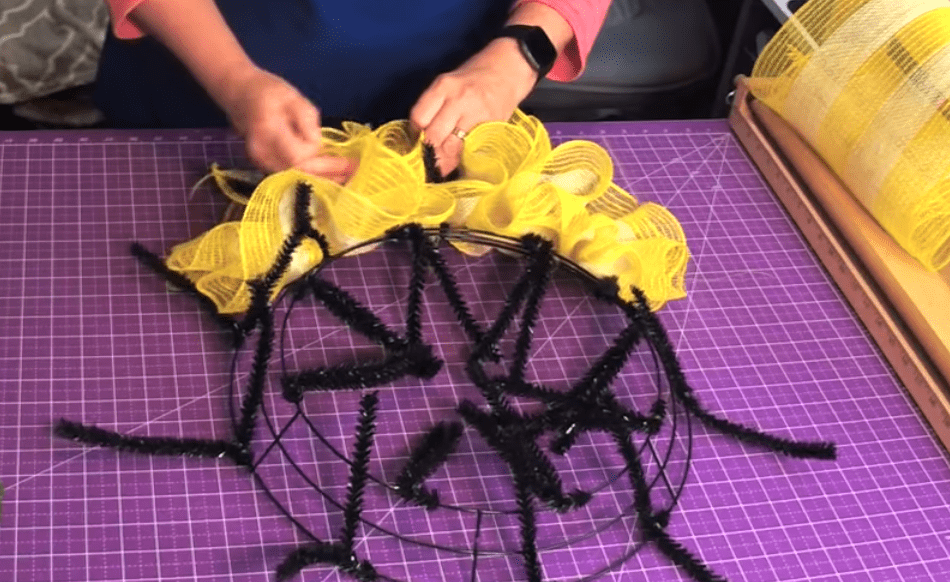
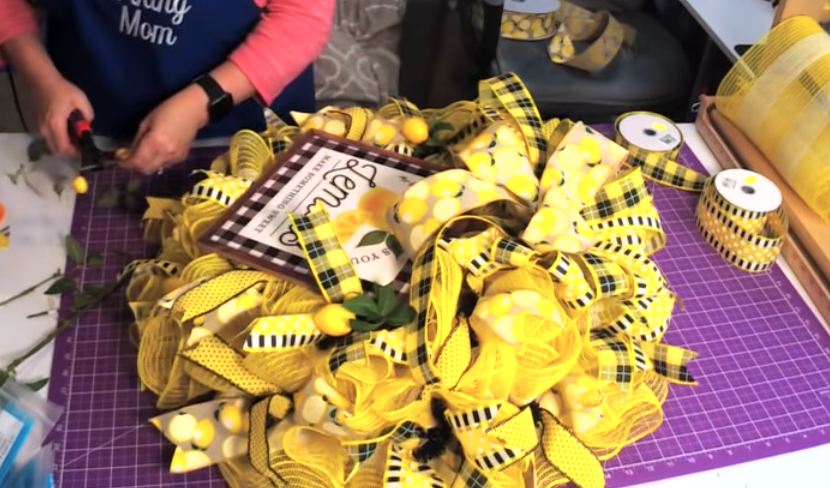
Moving on to the ribbons! This is where you see the wreath start to come alive. When taking my ribbons I am using 2.5 inches and a 1.5 inch also using 4 different patterns. I like to fold my ribbon and create a fold in that center and pinch in the middle and place it right over my ties. Don’t forget to pull those tails and fluff them out & create that bird-like shape.

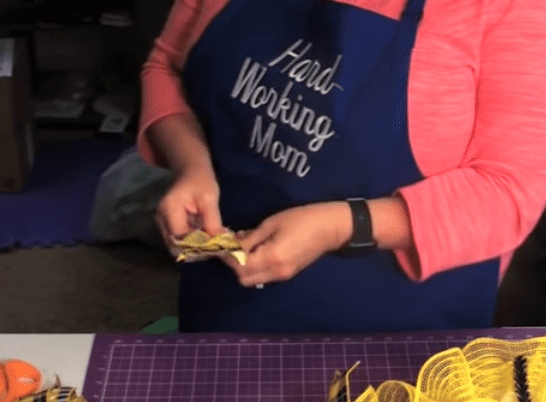
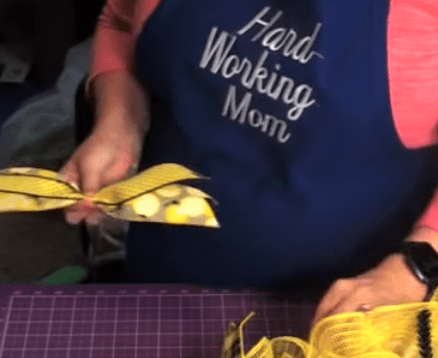
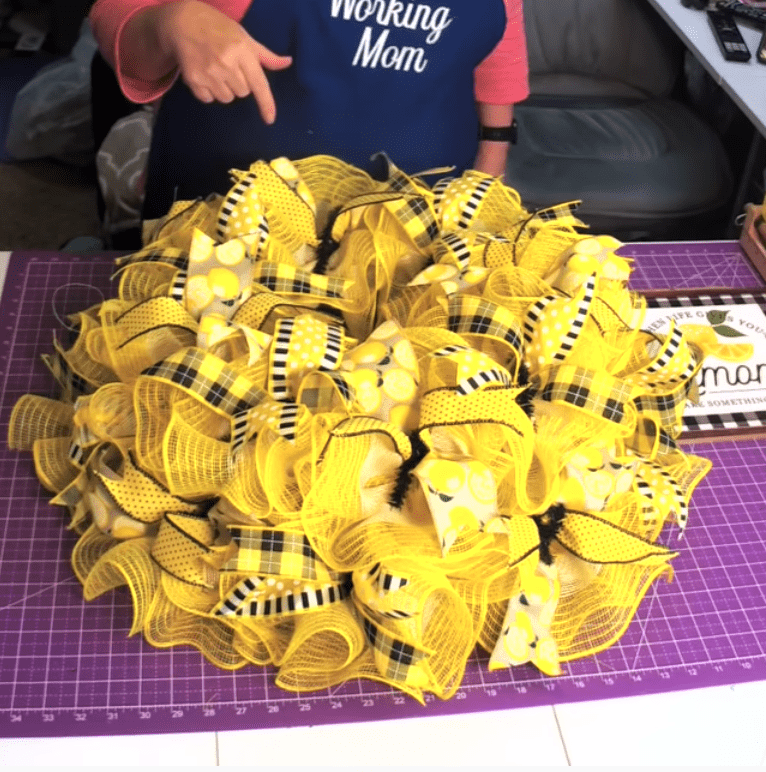
Now it doesn’t matter where you start I like to start at the bottom. After place the ribbon you could also take some lemons and add them over the ties if you wanted too, for this wreath I am just tucking my ties underneath. We will alternate these patterns and place them into the base on top of the mesh, I go over placement a little more with my Wreath Therapy Design group you can join us here.
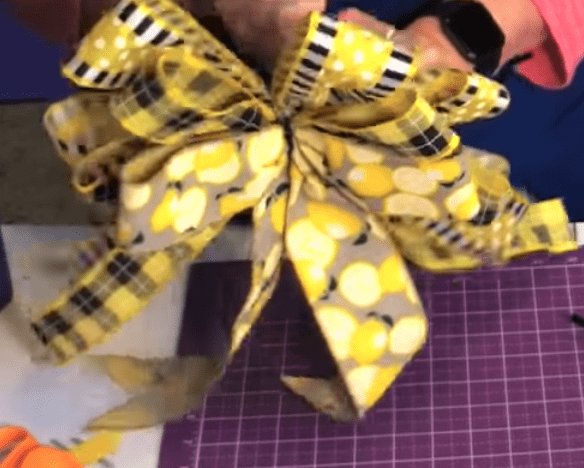
Moving onto the bow. I am going to be using the 4-in-1 bow maker today. I love how this black and white and yellow ribbon stands out so I want to use this in the back of my bow. We will start with this 2.5inch ribbon I will dovetail my ribbon and we will do an 8″ inch tail. No pattern with this ribbon so we can use our bow maker for this.
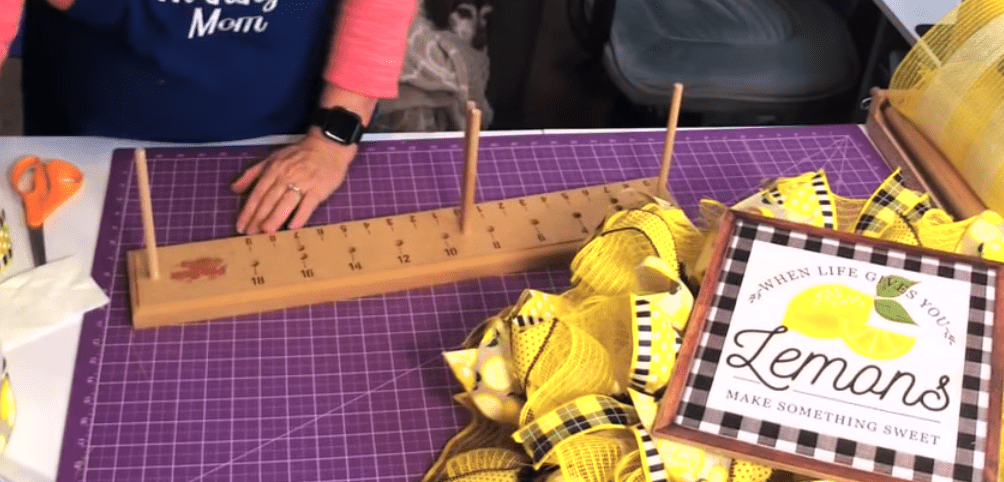
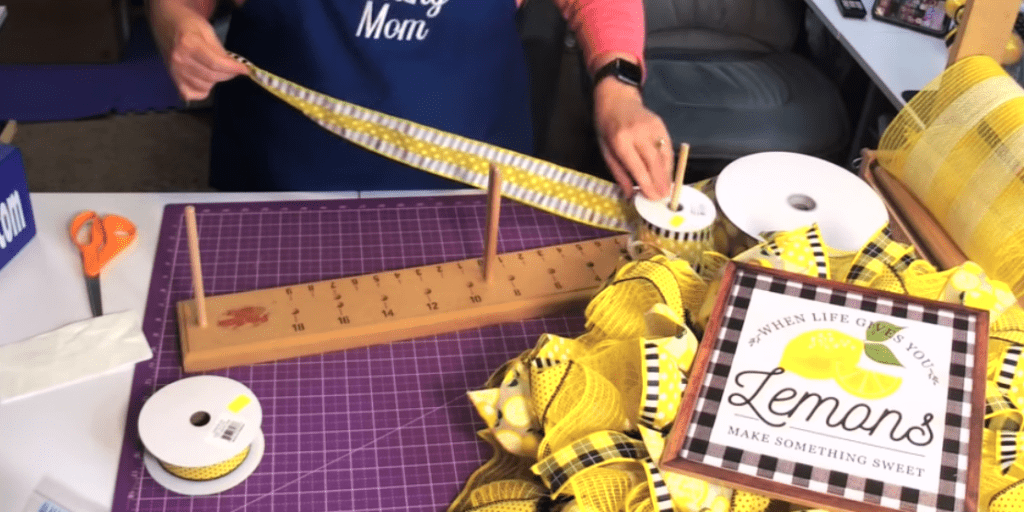
We will do 6″inch loops. Going out to the 6 and placing it so the pretty side of the ribbon is up, I will just place these ribbon on top of each other to ensure the loops. We will have 3 loops on each side of the bow. Don’t forget to twist in the center to make sure that pretty side comes up. After making sure the measurements are right I will start to space them out.
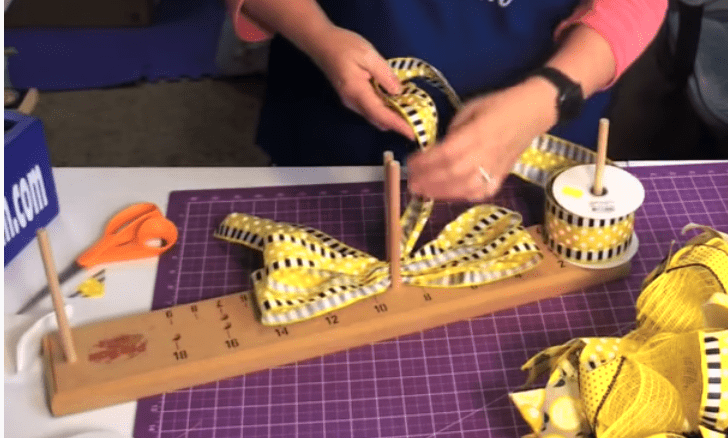
I love working with the 4-in- 1 because of how tight the pegs are and how good of pinch it has in the middle. We will change up the ribbon pattern next coming in with a 1.5″ inch buffalo black and yellow check. I have my tail longer for this one is about 12″. We will have two loops on each side going a little smaller as we go on the bow size this is around 5 1/2 inch loop.
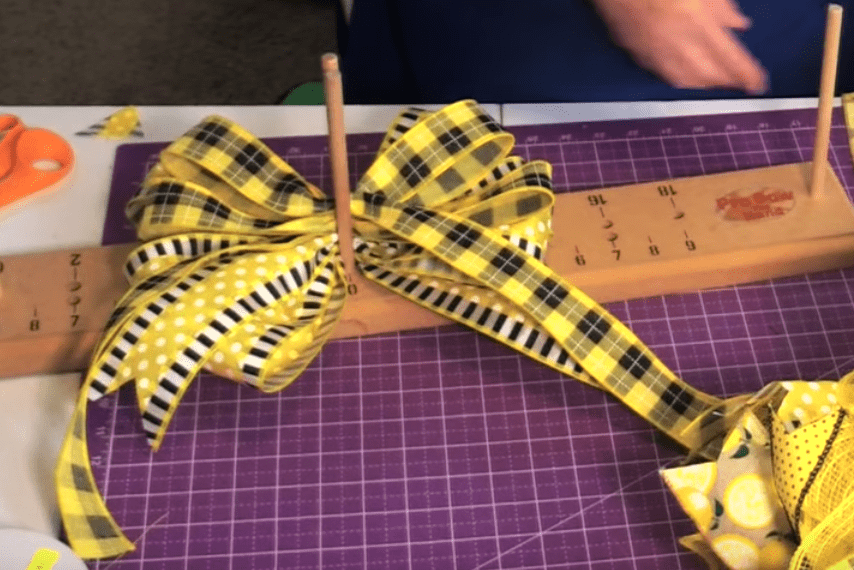
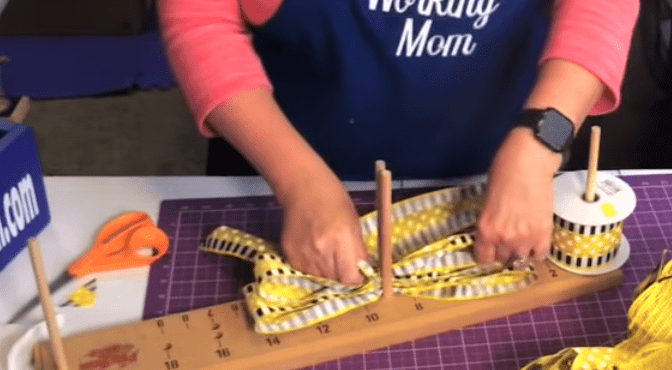
Coming in with this fun 2.5 inch Lemon pattern ribbon now this pattern is in the center so it will be okay to use the bow maker for this one as well. Now, this loop will be 5 inches, and the tail is around 10″ I like to curl my tails so I like to have different sizes. We will just do one loop on each side or two loops in total.
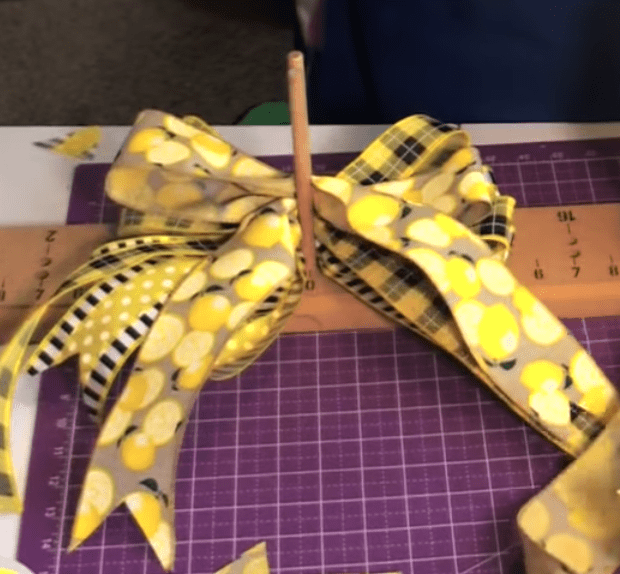
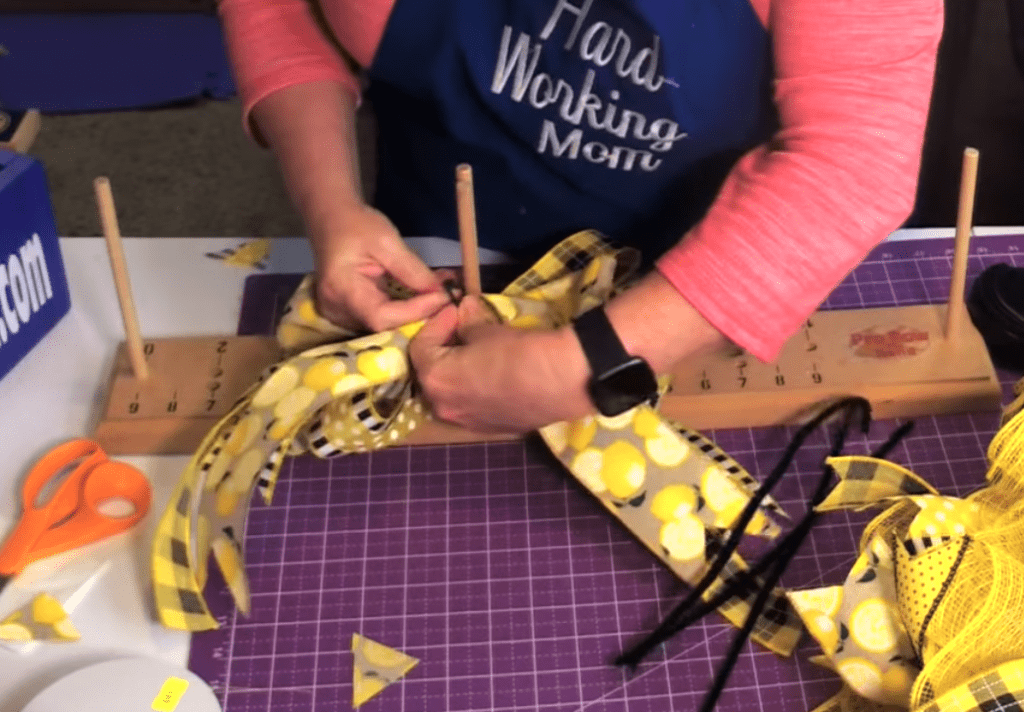

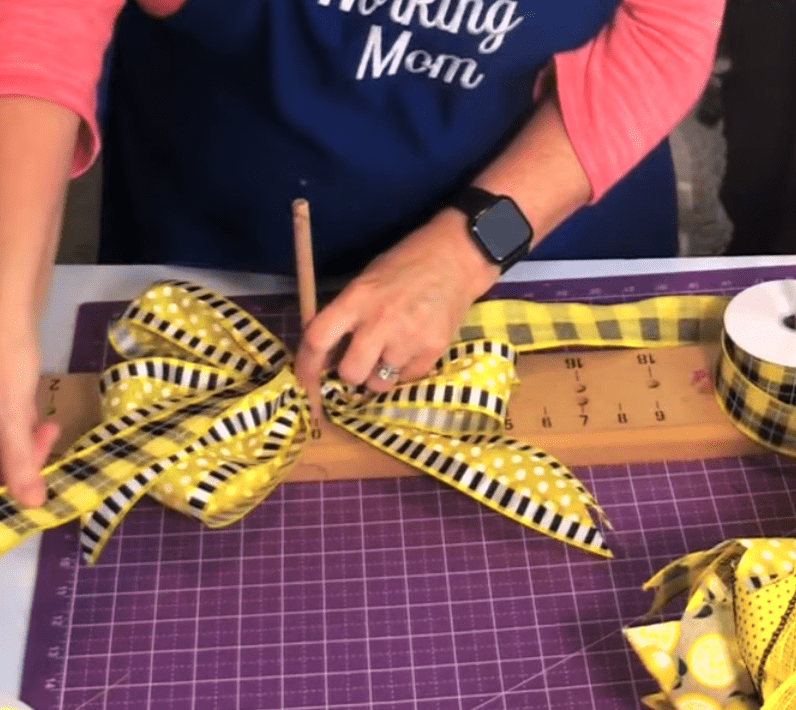
We have completed our bow for this project so I will take a zip tie and come under the bow making sure I have all the loops and going as close to that center peg as I can and will zip tie this tight enough so I don’t’ lose the loops, and just start the tie. You can see where that pinch is and start to pull it tight and place your pipe cleaner through the zip tie in the back and start to place your tails and loops where you want them before making that tight.
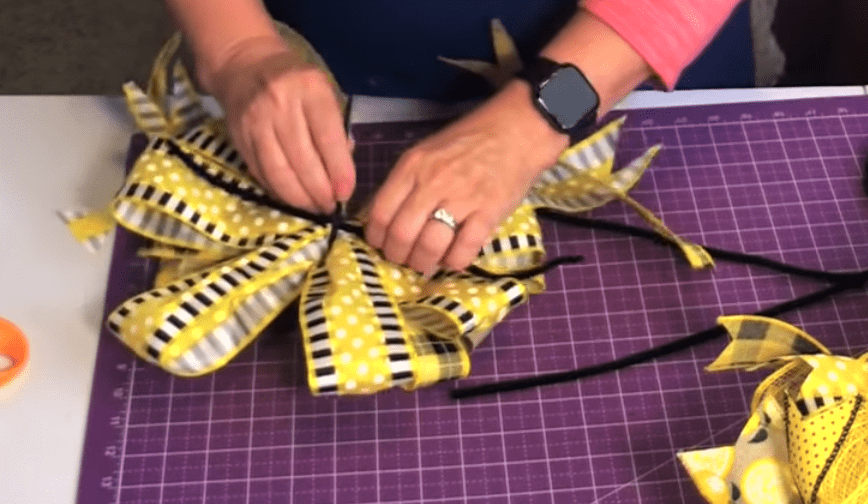
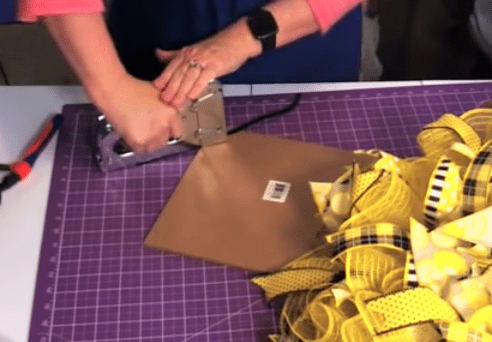
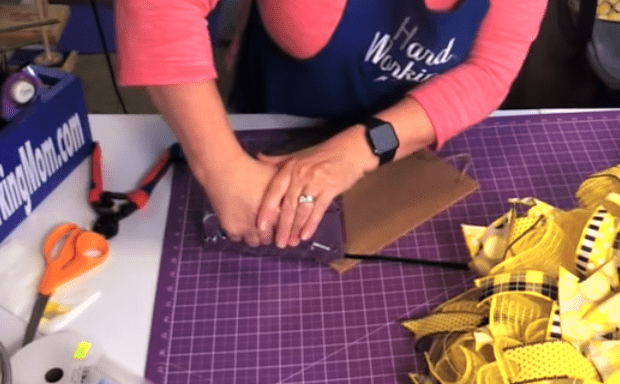
Now we can place the bow if you want it to stand out make sure you put it top of a tie if you want it a little move even with the wreath place in-between a tie. After placing this I will take my sign and match the corner with the bow so they complement each other. I stapled the corners of my sign and then when placing them I move around the mesh and tied it directly to the frame or I will push it right through the mesh.
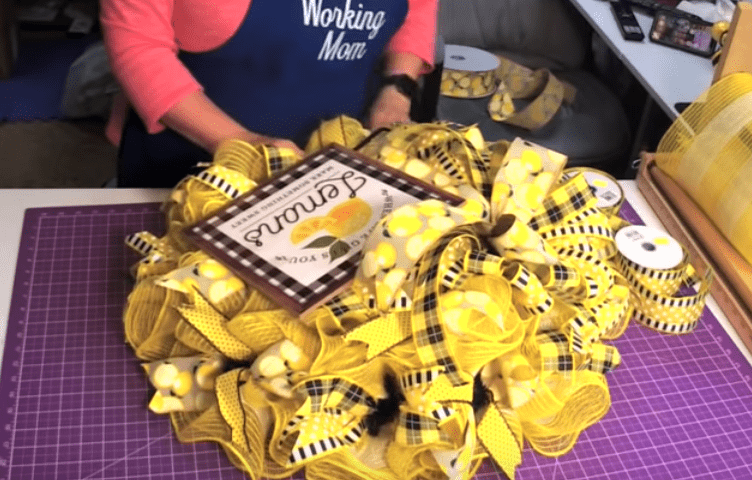
After we are done with our sign I will curl my ribbon tails and get those placed. I found some awesome lemon picks or garland and I want to add that into this wreath. So I will trim off the lemons and then turn on my glue skillet. I will dip this into the glue and then place it into the wreath. I love how these lemons popped and the green stems helped give it some dimension.

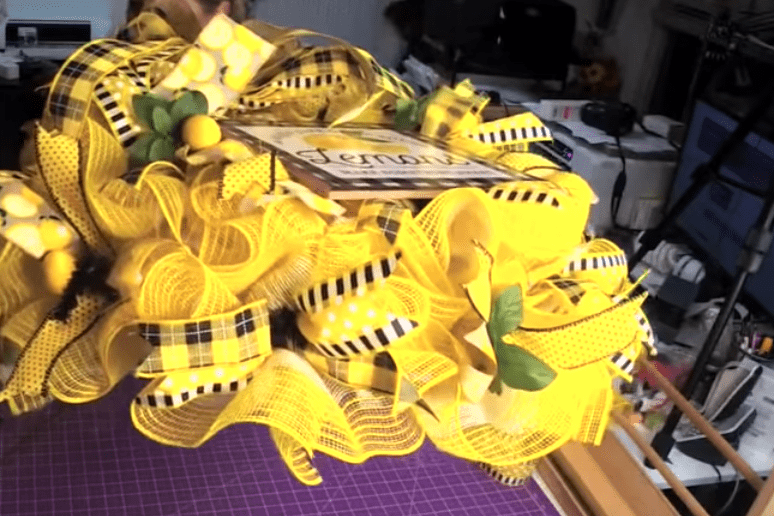
Here you have a perfect Jute Ruffle Lemon Wreath. How stinking cute is this? Make sure to follow me on Facebook, Instagram & YouTube and let me know if you make this wreath. Thank you all for joining me. See you next time for some #wreaththerapy
Affiliate links for tools used. If you purchase I will get a few pennies for the purchase. About enough to buy a stick of gum 🙂

Need Help?
If you are interested in learning more about our Success Path group, you are welcome to do so following this link: https://hardworkingmom.com/success-path
Want to learn Wreath Designing? Here is my Coaching Group, follow the link here: https://hardworkingmom.com/product/design-with-hard-working-mom-wreath-therapy-on-steroids/
Need a bundle, here is the link to save on both groups: https://hardworkingmom.com/product/design-with-hard-working-mom-wreath-therapy-on-steroids-combined-with-lori-jacobs-success-path/
Find Me Here
Email me: [email protected]
YouTube: @https://www.youtube.com/hardworkingmom
Instagram: @hardworkinglori
Twitter: @hardworkingmomtv
Facebook: @hardworkingmomtv
My Etsy Shop: DesignedByHWM
Hardworkingmom Store: https://hardworkingmomstore.com/
Amazon Influencer: https://www.amazon.com/shop/influencer-5ef69f14